Bilders vom Bau
Bilders vom Bau
Servus
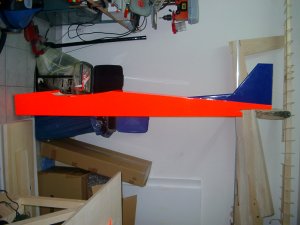
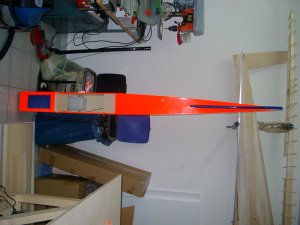
Da ich Urlaub habe und und einen netten Kumpel mit Fräse geht es recht schnell voran. Denke Ende nächster Woche fliegt der Paffi! Das Design entsteht auch langsam. Mir schwebt ein knalliges Orange mit Blockstreifen unter den Flächen zur besseren Sichtbarkeit vor. Also quasi wie ein F3B Modell
Hier mal ein paar Bilder:
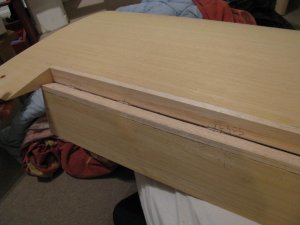
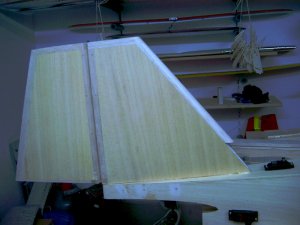
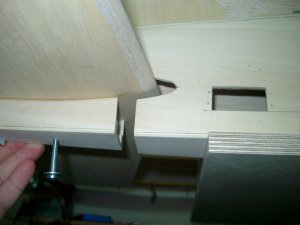
Bild1 Das aufgeklebte Seitenruder. Wird an den Seiten noch mit Balsaleisten verstärkt und eventuell
verstrebt
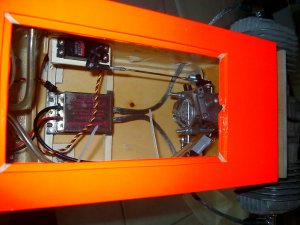
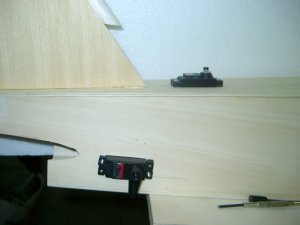
Bild 2 SR-Servo oben im Rumpf und eines der 2 HS 645MG auf Höhe. HR mitsamt Spornrad abnehmbar
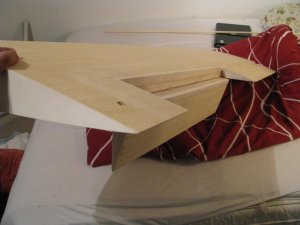
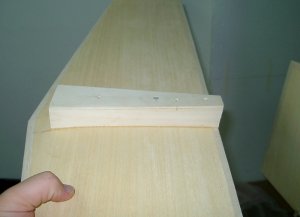
Bild 3 HR mit aufgeleimten Unterteil des Rumpfes
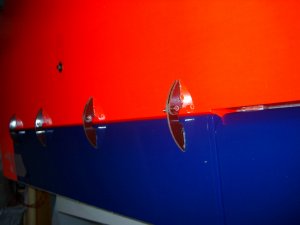
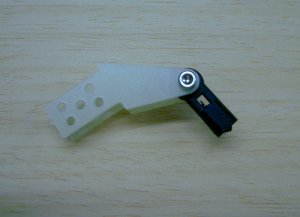
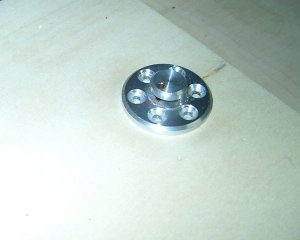
Bild 4 Doppelruderhorn mit Kugelkopf. Auf die Fläche kommen noch GFK Teile als Abstandhalter für
die Hörner. So haben sie immer den exakt gleichen Abstand.
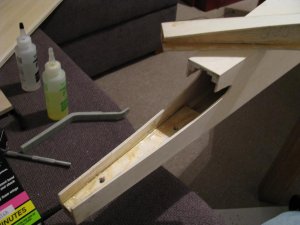
Bild 5 von meinem Kumpel passend zum vorgegeben Flächenausschnitt gezeichnete und gefräste
Servorahmen. Eingeklebt mit Uhu PorMax. Geniales Zeug, welches tief in das Styro difundiert
und so eine hochfeste Verbindung schafft.
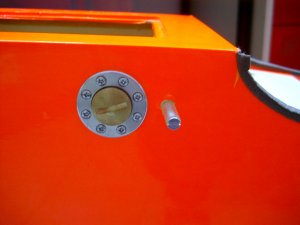
Bild 6 Schleppkupplung. Unter ihr werkelt ein HS 755 MG. Es gibt nichts Schlimmeres in einem
Schleppmodell wie unterdimensionierte Schleppkupplungsservos! (außer zu wenig Power und
senkrechthochreiss-Piloten)
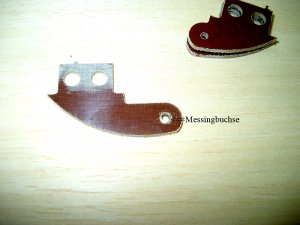
Bild 7 eigens für den Paffi gezeichnete und gefräste Landeklappenscharniere. Gefertigt aus Pertinax.
Bohrung des inneren Horns 4mm, um Messinghülse einzulassen. Äußere Hörner mit 3mm
Bohrung. So bewegt sich das innere Horn aufgrund der Klemmung auf dem MEssing und nicht
das Messing auf der M3 Schraube. So wegen der Haltbarkeit ;-)
Bild 8 zusammengesetztes Landeklappenscharnier
Bilders vom Bau
Servus
Da ich Urlaub habe und und einen netten Kumpel mit Fräse geht es recht schnell voran. Denke Ende nächster Woche fliegt der Paffi! Das Design entsteht auch langsam. Mir schwebt ein knalliges Orange mit Blockstreifen unter den Flächen zur besseren Sichtbarkeit vor. Also quasi wie ein F3B Modell
Hier mal ein paar Bilder:
Bild1 Das aufgeklebte Seitenruder. Wird an den Seiten noch mit Balsaleisten verstärkt und eventuell
verstrebt
Bild 2 SR-Servo oben im Rumpf und eines der 2 HS 645MG auf Höhe. HR mitsamt Spornrad abnehmbar
Bild 3 HR mit aufgeleimten Unterteil des Rumpfes
Bild 4 Doppelruderhorn mit Kugelkopf. Auf die Fläche kommen noch GFK Teile als Abstandhalter für
die Hörner. So haben sie immer den exakt gleichen Abstand.
Bild 5 von meinem Kumpel passend zum vorgegeben Flächenausschnitt gezeichnete und gefräste
Servorahmen. Eingeklebt mit Uhu PorMax. Geniales Zeug, welches tief in das Styro difundiert
und so eine hochfeste Verbindung schafft.
Bild 6 Schleppkupplung. Unter ihr werkelt ein HS 755 MG. Es gibt nichts Schlimmeres in einem
Schleppmodell wie unterdimensionierte Schleppkupplungsservos! (außer zu wenig Power und
senkrechthochreiss-Piloten)
Bild 7 eigens für den Paffi gezeichnete und gefräste Landeklappenscharniere. Gefertigt aus Pertinax.
Bohrung des inneren Horns 4mm, um Messinghülse einzulassen. Äußere Hörner mit 3mm
Bohrung. So bewegt sich das innere Horn aufgrund der Klemmung auf dem MEssing und nicht
das Messing auf der M3 Schraube. So wegen der Haltbarkeit ;-)
Bild 8 zusammengesetztes Landeklappenscharnier
Anhänge
-
 IMGP0199kl.jpg163,6 KB · Aufrufe: 197
 -
 IMGP0209kl.jpg140,3 KB · Aufrufe: 205
 -
 IMGP0201kl.jpg140,6 KB · Aufrufe: 204
 -
 IMGP0215kl.jpg169,7 KB · Aufrufe: 201
 -
 IMGP0197kl.jpg158,6 KB · Aufrufe: 206
 -
 IMGP0206kl.jpg191,2 KB · Aufrufe: 217
 -
 IMGP0207kl.jpg182,7 KB · Aufrufe: 196
 -
 IMGP0204kl.jpg160,8 KB · Aufrufe: 162

 Not much left from my english lessons. Hardly speaking english for 2 years and so much is forgotten...
")