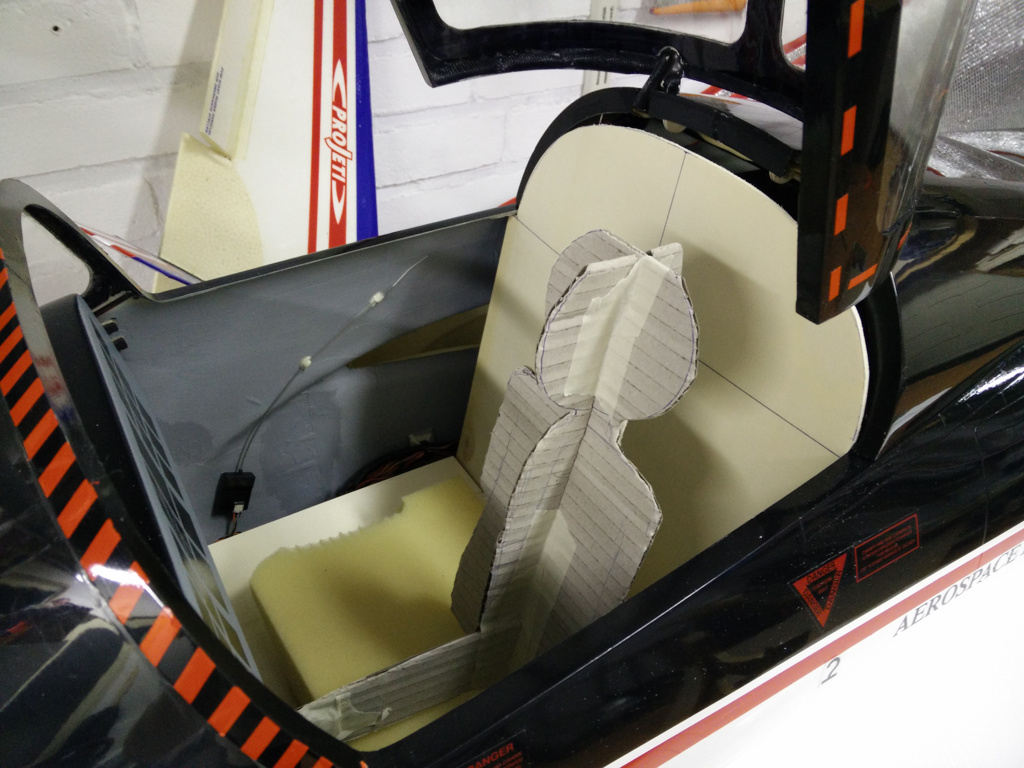
Last year i bought a second hand CARF Tutor in AETE schema. It was build quite nicely but very practical. The fuel / smoke and air connectors were placed below the canopy which needs to open often. The builder had created a simple plastic half body cockpit fixed inside the canopy hatch. This did not look that great. The dashboard was not build also. I rearranged the fuel and other connectors to the front hatch. That allowed me to keep the canopy closed during normal operations. Time to create something for the cockpit ")
I started with light plywood for the bottom and rear panels. This is very lightweight wood but much stronger then balsa. I created a dummy pilot to get the rough dimensions.
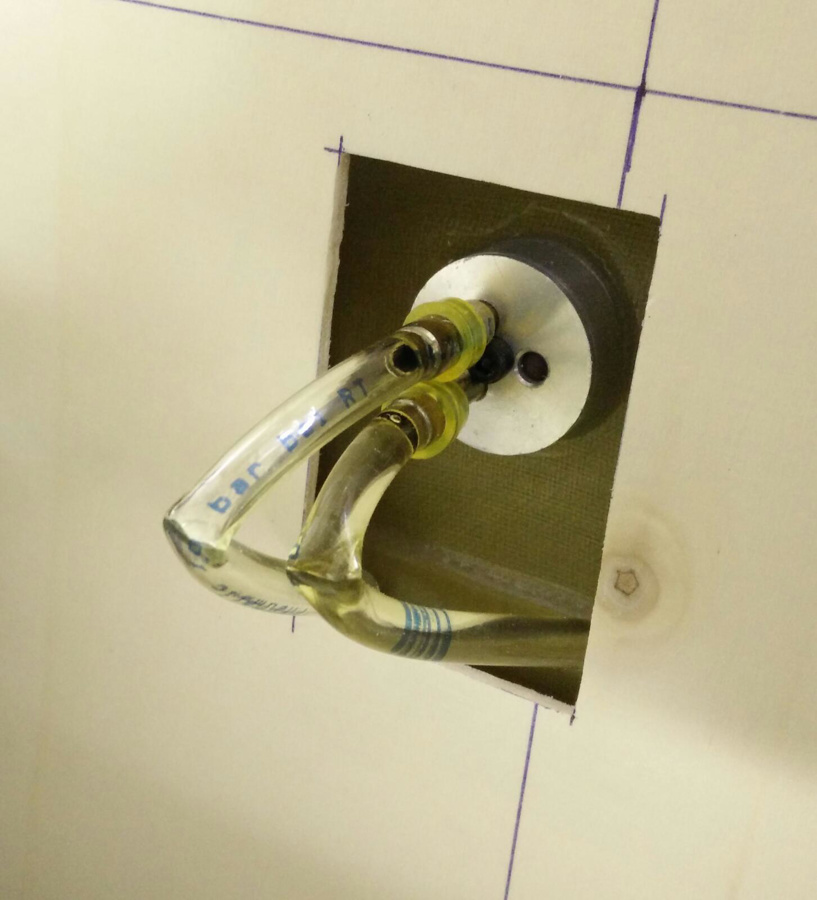
One big issue to be solved: The tank connections. The main tank is placed in the CoG but the fuel connectors are in the way of my rear panel. I created a hole for now and will find a solution for the bend fuel lines later.
I created chairs from 5mm balsa with 0.8mm plywood side supports. The center console is created from 5mm balsa also and the switch panels from 0.8mm plywood. The weight quickly adds up
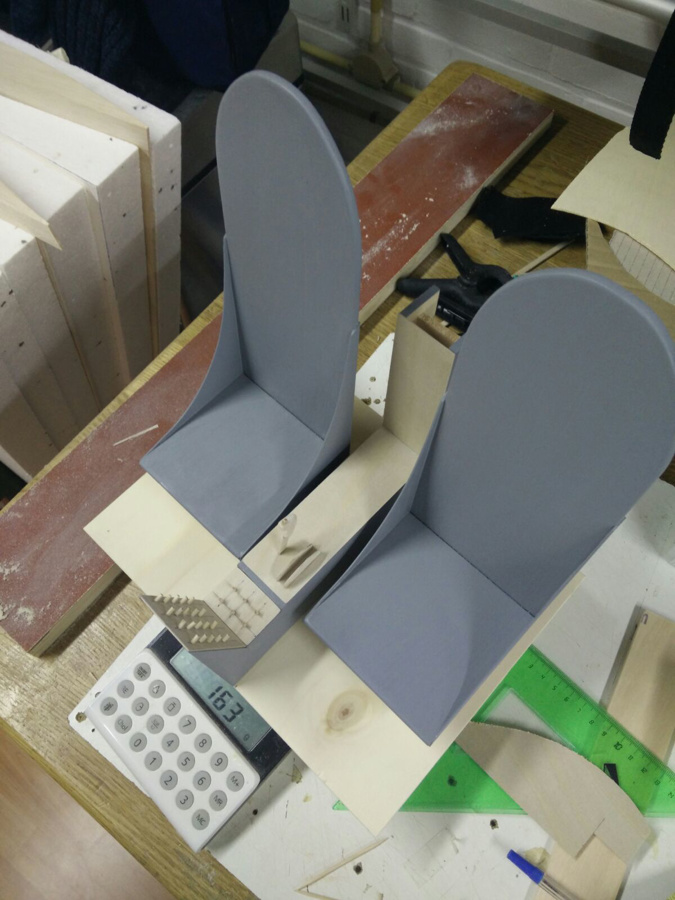
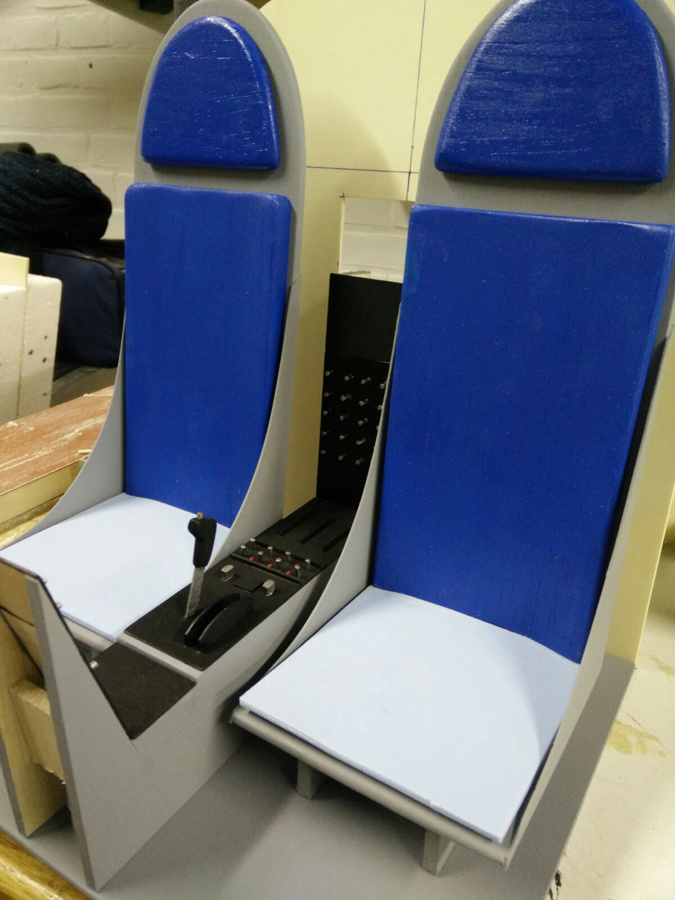
The seats back are created from hollow balsa with a 1.5mm sheet on 5mm balsa frame. The head rest is 5mm balsa. Painted it looks nice already.
Time fit mount / fit it in the fuselage. The bottom and rear panel will be screwed together. The bottom palen will be screwed in the fuselage in 2 points and the read panel also. Easy to remove because it has to be assembled inside the fuselage. The chairs are screwed on the bottom panel by 1 screw. The slide under a support at the back. You can see the rear center console will cover the tank connector. I changes the tubing to tygon which can make the small curve much better. Tygon is not the optimal choice for the connection from the tank to the hopper but i have used it before on fast large engines and it does work.
.jpg)
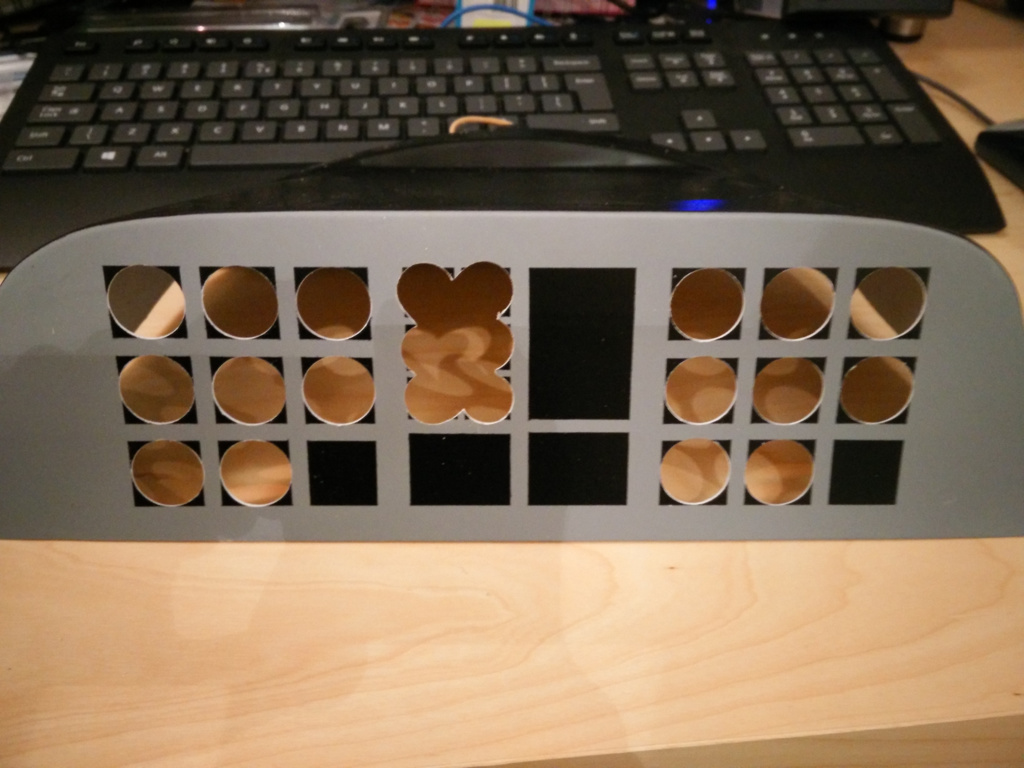
The the pilot and parts for the dashboard arrive. The dials need holes in the dashboard which is made from abs. Drilling and filing was an option but i found a way to make very nice holes for the large dials. Sadly is did not work for the small dials... The larger dial holes are created by spinning an angled grinding stone in the drill. I drilled 15mm holes and then used the grinding stone to create friction end melt / extrude the abs until is was the right size hole. I cut the extruded flange in the back and had a nice perfect hole. The dials all fit great and stay in place in the holes.
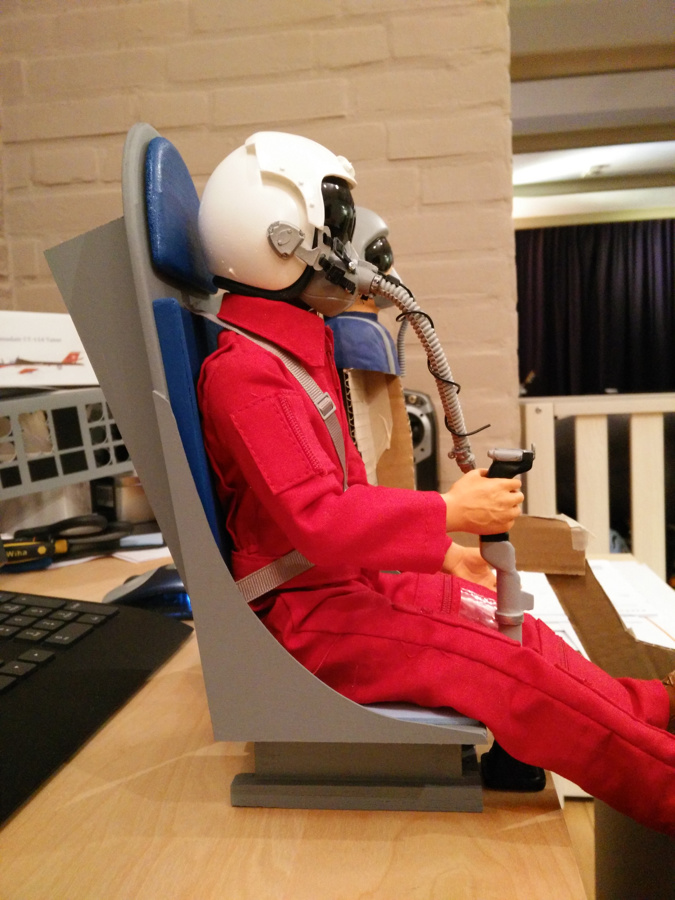
The chairs are completed with belts to hold the pilot. The chairs slide to the back and are fixed with 1 screw in the front. This posed a problem with the yoke. I could not glue them to the bottom panel because it would lock the chair. I glued them to the chair instead Now the chair with pilot and yoke can be placed inside the cockpit together. The arrive pilot fitted great (my cardboard dummy had the right dimensions).
I finished the dashboard with some lights and switches and the dials. All together it looks really good. There is still one item missing: The top border of the dashboard. This will be made from a small 5mm black foam edge.
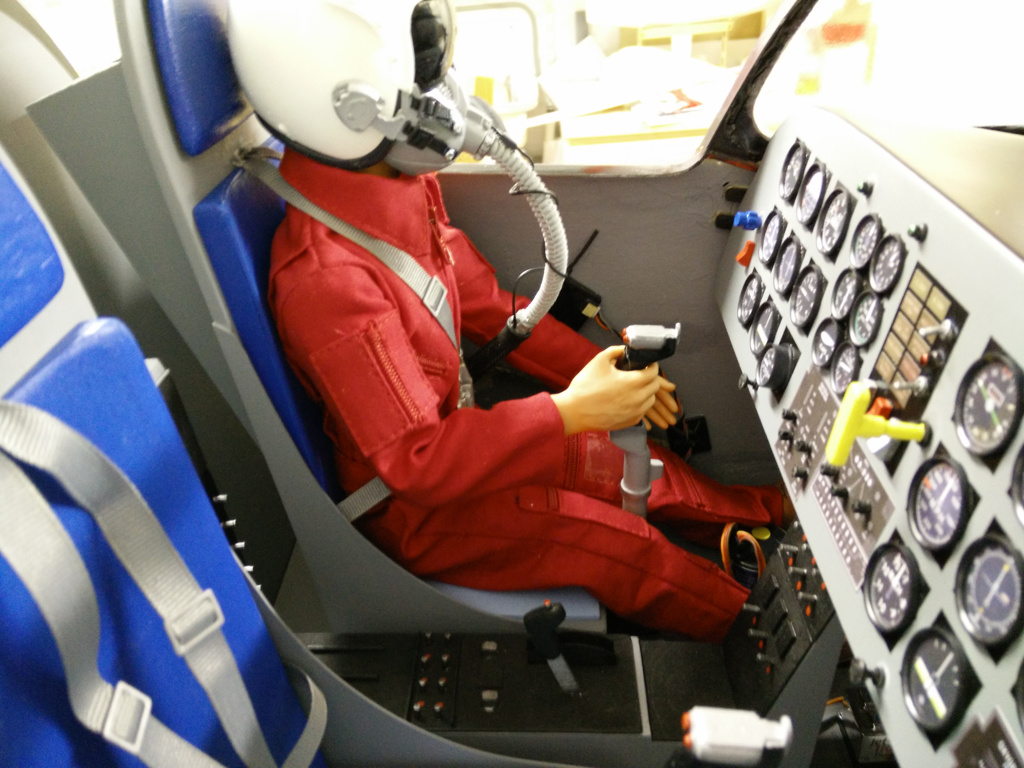
The CoG was to far to the rear (i needed down trim for level flight) so i checked with the new cockpit. It flew better now and i like it! Cockpit survived the flight also.
I started with light plywood for the bottom and rear panels. This is very lightweight wood but much stronger then balsa. I created a dummy pilot to get the rough dimensions.
One big issue to be solved: The tank connections. The main tank is placed in the CoG but the fuel connectors are in the way of my rear panel. I created a hole for now and will find a solution for the bend fuel lines later.
I created chairs from 5mm balsa with 0.8mm plywood side supports. The center console is created from 5mm balsa also and the switch panels from 0.8mm plywood. The weight quickly adds up
The seats back are created from hollow balsa with a 1.5mm sheet on 5mm balsa frame. The head rest is 5mm balsa. Painted it looks nice already.
Time fit mount / fit it in the fuselage. The bottom and rear panel will be screwed together. The bottom palen will be screwed in the fuselage in 2 points and the read panel also. Easy to remove because it has to be assembled inside the fuselage. The chairs are screwed on the bottom panel by 1 screw. The slide under a support at the back. You can see the rear center console will cover the tank connector. I changes the tubing to tygon which can make the small curve much better. Tygon is not the optimal choice for the connection from the tank to the hopper but i have used it before on fast large engines and it does work.
The the pilot and parts for the dashboard arrive. The dials need holes in the dashboard which is made from abs. Drilling and filing was an option but i found a way to make very nice holes for the large dials. Sadly is did not work for the small dials... The larger dial holes are created by spinning an angled grinding stone in the drill. I drilled 15mm holes and then used the grinding stone to create friction end melt / extrude the abs until is was the right size hole. I cut the extruded flange in the back and had a nice perfect hole. The dials all fit great and stay in place in the holes.
The chairs are completed with belts to hold the pilot. The chairs slide to the back and are fixed with 1 screw in the front. This posed a problem with the yoke. I could not glue them to the bottom panel because it would lock the chair. I glued them to the chair instead
Now the chair with pilot and yoke can be placed inside the cockpit together. The arrive pilot fitted great (my cardboard dummy had the right dimensions).
I finished the dashboard with some lights and switches and the dials. All together it looks really good. There is still one item missing: The top border of the dashboard. This will be made from a small 5mm black foam edge.
The CoG was to far to the rear (i needed down trim for level flight) so i checked with the new cockpit. It flew better now and i like it! Cockpit survived the flight also.