Flying-Cloud Bilderbaubericht

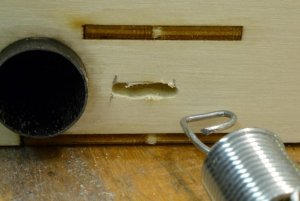
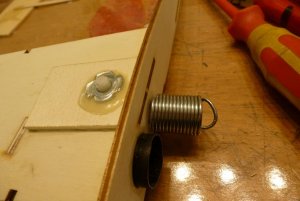
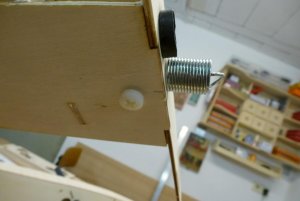
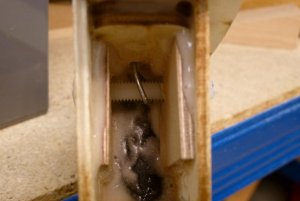
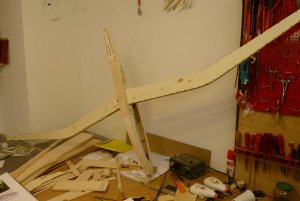
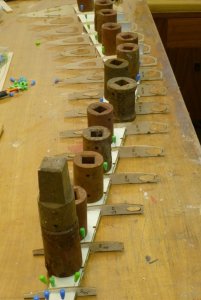
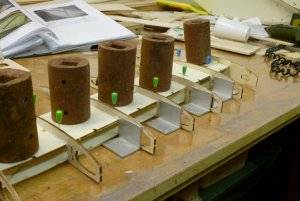
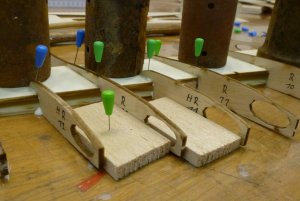
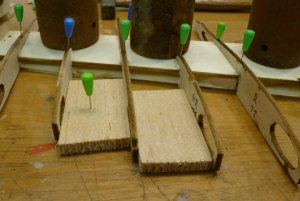
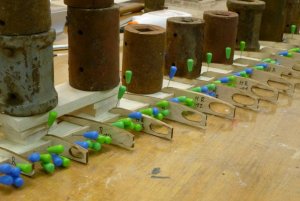
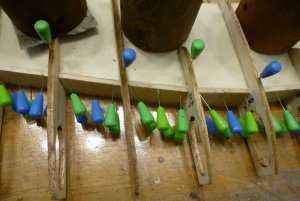
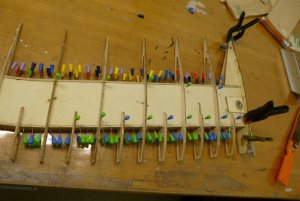
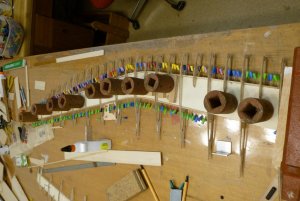
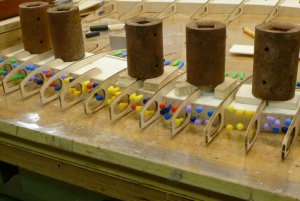
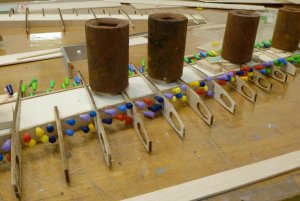
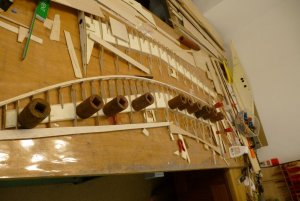
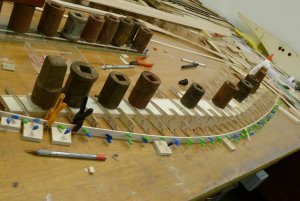
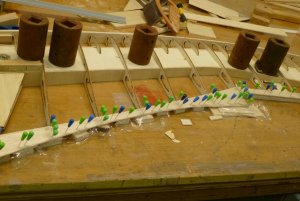
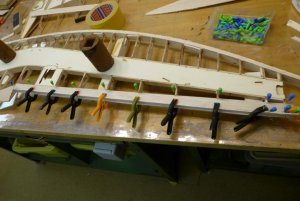
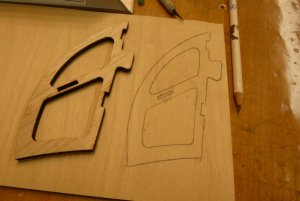
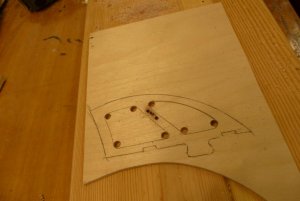
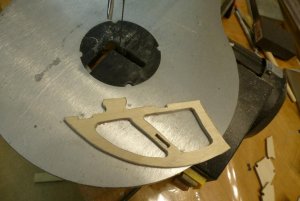
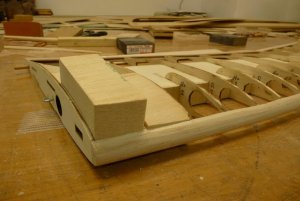
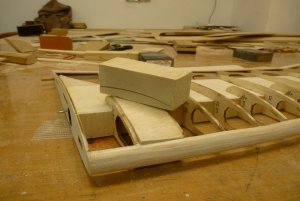
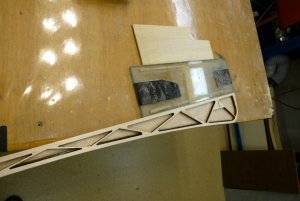
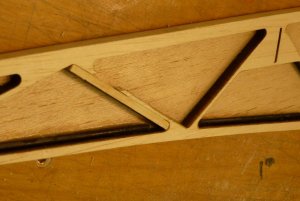
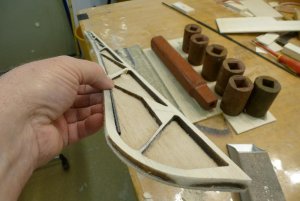
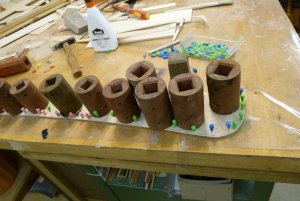
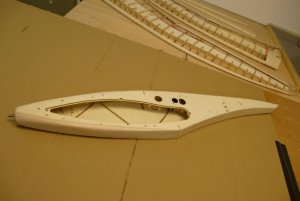
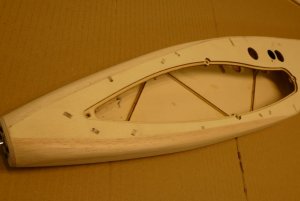
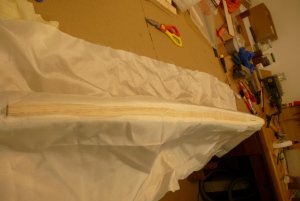
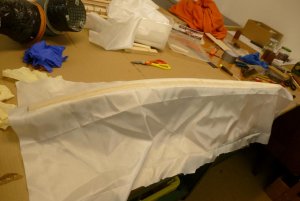
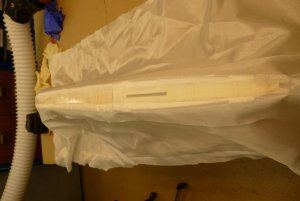
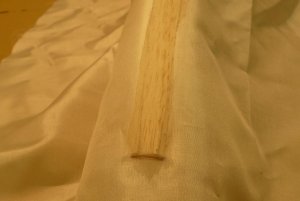
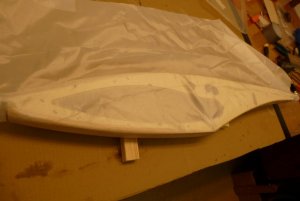
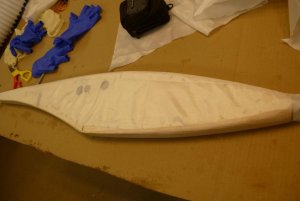
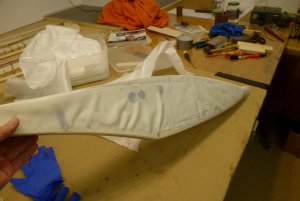
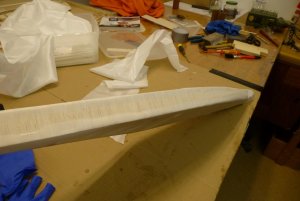
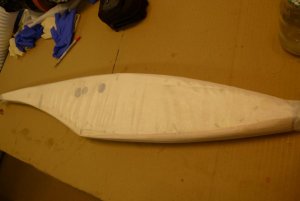
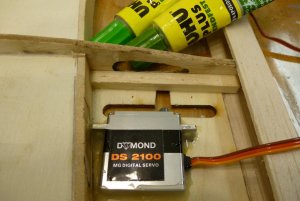
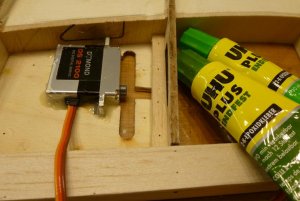
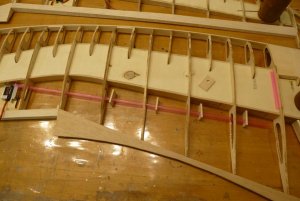
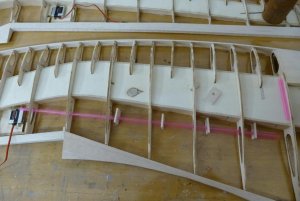
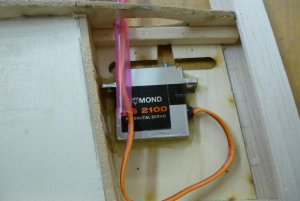
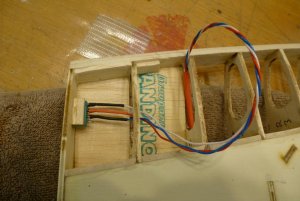
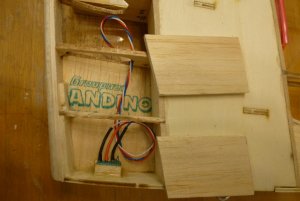
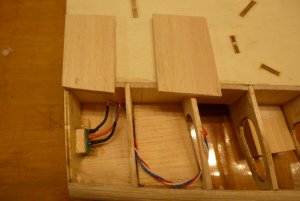
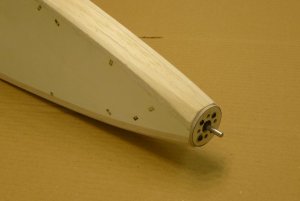
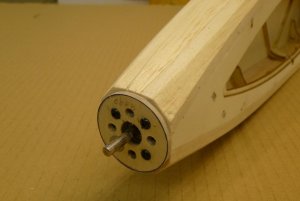
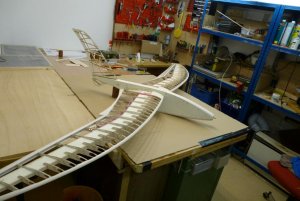
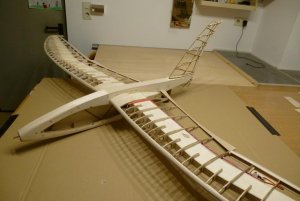
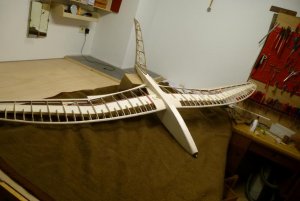
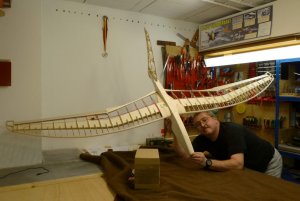
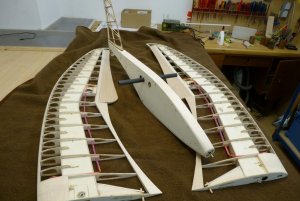
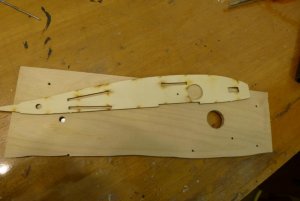
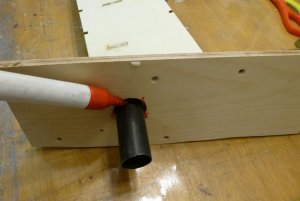
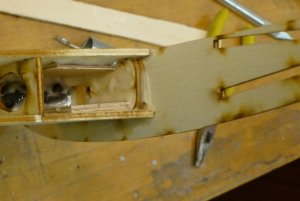
Im nächsten Bauabschnitt werden die Hülsen für die Flächensteckung mit der Wurzelrippe angepasst und verklebt.
 

Anhänge

  • Flying-Cloud 108.JPG
    Flying-Cloud 108.JPG
    43,5 KB · Aufrufe: 113
  • Flying-Cloud 109.JPG
    Flying-Cloud 109.JPG
    47,1 KB · Aufrufe: 114
  • Flying-Cloud 110.JPG
    Flying-Cloud 110.JPG
    45,9 KB · Aufrufe: 117
  • Flying-Cloud 112.JPG
    Flying-Cloud 112.JPG
    54,2 KB · Aufrufe: 117
  • Flying-Cloud 118.JPG
    Flying-Cloud 118.JPG
    43,1 KB · Aufrufe: 118
  • Flying-Cloud 119.JPG
    Flying-Cloud 119.JPG
    53,2 KB · Aufrufe: 128
  • Flying-Cloud 121.JPG
    Flying-Cloud 121.JPG
    46,6 KB · Aufrufe: 115
Die Feder für die Flächenbefestigung habe ich mir gebogen, sie wird an der rechten Tragfläche festgeschraubt.
 

Anhänge

  • Flying-Cloud 114.JPG
    Flying-Cloud 114.JPG
    54,6 KB · Aufrufe: 102
  • Flying-Cloud 122.JPG
    Flying-Cloud 122.JPG
    55,6 KB · Aufrufe: 105
  • Flying-Cloud 123.JPG
    Flying-Cloud 123.JPG
    42,1 KB · Aufrufe: 100
  • Flying-Cloud 124.JPG
    Flying-Cloud 124.JPG
    55,5 KB · Aufrufe: 99
  • Flying-Cloud 125.JPG
    Flying-Cloud 125.JPG
    38,7 KB · Aufrufe: 103
  • Flying-Cloud 126.JPG
    Flying-Cloud 126.JPG
    40,3 KB · Aufrufe: 103
An der Linken Fläche wird die Feder in einen Haken an der Wurzelrippe gezogen.
 

Anhänge

  • Flying-Cloud 127.JPG
    Flying-Cloud 127.JPG
    59,6 KB · Aufrufe: 112
  • Flying-Cloud 128.JPG
    Flying-Cloud 128.JPG
    41,1 KB · Aufrufe: 110
  • Flying-Cloud 129.JPG
    Flying-Cloud 129.JPG
    50,6 KB · Aufrufe: 106
Nun werden die Rippen aufgesteckt, ausgerichtet und verleimt.
 

Anhänge

  • Flying-Cloud 130.JPG
    Flying-Cloud 130.JPG
    82,7 KB · Aufrufe: 104
  • Flying-Cloud 131.JPG
    Flying-Cloud 131.JPG
    66,1 KB · Aufrufe: 92
  • Flying-Cloud 132.JPG
    Flying-Cloud 132.JPG
    67,9 KB · Aufrufe: 89
  • Flying-Cloud 133.JPG
    Flying-Cloud 133.JPG
    63,9 KB · Aufrufe: 93
  • Flying-Cloud 134.JPG
    Flying-Cloud 134.JPG
    62,6 KB · Aufrufe: 94
Die Rippen habe ich an der Box hinten und vorne mit Balsabrettchen verkastet..
 

Anhänge

  • Flying-Cloud 135.JPG
    Flying-Cloud 135.JPG
    70 KB · Aufrufe: 87
  • Flying-Cloud 136.JPG
    Flying-Cloud 136.JPG
    70,2 KB · Aufrufe: 99
  • Flying-Cloud 137.JPG
    Flying-Cloud 137.JPG
    62,9 KB · Aufrufe: 98
  • Flying-Cloud 138.JPG
    Flying-Cloud 138.JPG
    54 KB · Aufrufe: 85
  • Flying-Cloud 140.JPG
    Flying-Cloud 140.JPG
    76,9 KB · Aufrufe: 101
  • Flying-Cloud 142.JPG
    Flying-Cloud 142.JPG
    74,7 KB · Aufrufe: 96
Die Nasenleiste wird mit 3 Lagen Balsa angeleimt:
 

Anhänge

  • Flying-Cloud 141.JPG
    Flying-Cloud 141.JPG
    71,6 KB · Aufrufe: 100
  • Flying-Cloud 144.JPG
    Flying-Cloud 144.JPG
    73,6 KB · Aufrufe: 97
  • Flying-Cloud 146.JPG
    Flying-Cloud 146.JPG
    63 KB · Aufrufe: 99
  • Flying-Cloud 147.JPG
    Flying-Cloud 147.JPG
    78,3 KB · Aufrufe: 97
  • Flying-Cloud 148.JPG
    Flying-Cloud 148.JPG
    71,3 KB · Aufrufe: 86
  • Flying-Cloud 149.JPG
    Flying-Cloud 149.JPG
    72,5 KB · Aufrufe: 102
  • Flying-Cloud 154.JPG
    Flying-Cloud 154.JPG
    79,6 KB · Aufrufe: 101
Anschließend habe ich die Endleisten angeleimt:
 

Anhänge

  • Flying-Cloud 156.JPG
    Flying-Cloud 156.JPG
    72,5 KB · Aufrufe: 104
  • Flying-Cloud 159.JPG
    Flying-Cloud 159.JPG
    76,2 KB · Aufrufe: 107
  • Flying-Cloud 151.JPG
    Flying-Cloud 151.JPG
    57,6 KB · Aufrufe: 99
  • Flying-Cloud 150.JPG
    Flying-Cloud 150.JPG
    67,7 KB · Aufrufe: 102
  • Flying-Cloud 149.JPG
    Flying-Cloud 149.JPG
    72,5 KB · Aufrufe: 107
Die beiliegenden Balsa - Randbogen werden durch Sperrholz ersetzt, somit wird das Modell in diesem Bereich besser geschützt.
 

Anhänge

  • Flying-Cloud 160.JPG
    Flying-Cloud 160.JPG
    54,2 KB · Aufrufe: 84
  • Flying-Cloud 161.JPG
    Flying-Cloud 161.JPG
    45,4 KB · Aufrufe: 84
  • Flying-Cloud 162.JPG
    Flying-Cloud 162.JPG
    56,4 KB · Aufrufe: 81
  • Flying-Cloud 163.JPG
    Flying-Cloud 163.JPG
    62,4 KB · Aufrufe: 89
Mit Hilfe von angefertigten Balsaschablonen wird die Nasenleiste verschliffen:
 

Anhänge

  • Flying-Cloud 164.JPG
    Flying-Cloud 164.JPG
    58,6 KB · Aufrufe: 93
  • Flying-Cloud 165.JPG
    Flying-Cloud 165.JPG
    57,7 KB · Aufrufe: 91
  • Flying-Cloud 166.JPG
    Flying-Cloud 166.JPG
    62,7 KB · Aufrufe: 96
Nun habe ich die beiden Querruder aufgebaut, diese werden an der Hinterkante mit CFK Röhrchen ausgesteift und verstärkt. ( mit Sekundenkleber eingeklebt)
 

Anhänge

  • Flying-Cloud 168.JPG
    Flying-Cloud 168.JPG
    57,2 KB · Aufrufe: 93
  • Flying-Cloud 167.JPG
    Flying-Cloud 167.JPG
    60,7 KB · Aufrufe: 93
  • Flying-Cloud 169.JPG
    Flying-Cloud 169.JPG
    73,4 KB · Aufrufe: 94
  • Flying-Cloud 170.JPG
    Flying-Cloud 170.JPG
    68,6 KB · Aufrufe: 94
  • Flying-Cloud 171.JPG
    Flying-Cloud 171.JPG
    75,8 KB · Aufrufe: 92
  • Flying-Cloud 172.JPG
    Flying-Cloud 172.JPG
    72,6 KB · Aufrufe: 89
  • Flying-Cloud 173.JPG
    Flying-Cloud 173.JPG
    59,1 KB · Aufrufe: 91
  • Flying-Cloud 174.JPG
    Flying-Cloud 174.JPG
    51,9 KB · Aufrufe: 88
Nach dem Verschleifen wird das Ruder oben geschlossen:
 

Anhänge

  • Flying-Cloud 175.JPG
    Flying-Cloud 175.JPG
    56,9 KB · Aufrufe: 78
  • Flying-Cloud 176.JPG
    Flying-Cloud 176.JPG
    55,8 KB · Aufrufe: 86
  • Flying-Cloud 177.JPG
    Flying-Cloud 177.JPG
    76,7 KB · Aufrufe: 80
Im nächsten Bauabschnitt habe ich das Modell mit Gewebe ( Koverall von SIG) bespannt. Alle Bauteile werden drei mal mit verdünntem Porenfüller vorgestrichen. Zwischen dem ersten und dem zweiten Anstrich habe ich diese mit 200 er Körnung zwischengeschliffen.
 

Anhänge

  • Flying-Cloud 211.JPG
    Flying-Cloud 211.JPG
    45,3 KB · Aufrufe: 94
  • Flying-Cloud 212.JPG
    Flying-Cloud 212.JPG
    38,8 KB · Aufrufe: 85
  • Flying-Cloud 213.JPG
    Flying-Cloud 213.JPG
    64,4 KB · Aufrufe: 79
Die Bespannung des Rumpfes beginne ich an der Oberseite, mit verdünntem Porenfüller wird das Gewebe durch zweimaligen Anstrich angeheftet.
 

Anhänge

  • Flying-Cloud 214.JPG
    Flying-Cloud 214.JPG
    43,6 KB · Aufrufe: 81
  • Flying-Cloud 215.JPG
    Flying-Cloud 215.JPG
    50,7 KB · Aufrufe: 85
  • Flying-Cloud 216.JPG
    Flying-Cloud 216.JPG
    39,9 KB · Aufrufe: 84
  • Flying-Cloud 217.JPG
    Flying-Cloud 217.JPG
    46,2 KB · Aufrufe: 120
  • Flying-Cloud 218.JPG
    Flying-Cloud 218.JPG
    33,8 KB · Aufrufe: 68
Danach habe ich das Gewebe auf die Seiten des Rumpfes umgelegt und am unteren Ende mit Porenfüller befestigt.
 

Anhänge

  • Flying-Cloud 219.JPG
    Flying-Cloud 219.JPG
    36,5 KB · Aufrufe: 77
  • Flying-Cloud 220.JPG
    Flying-Cloud 220.JPG
    43 KB · Aufrufe: 80
  • Flying-Cloud 221.JPG
    Flying-Cloud 221.JPG
    37,2 KB · Aufrufe: 78
  • Flying-Cloud 222.JPG
    Flying-Cloud 222.JPG
    39,5 KB · Aufrufe: 85
  • Flying-Cloud 223.JPG
    Flying-Cloud 223.JPG
    33,3 KB · Aufrufe: 88
  • Flying-Cloud 224.JPG
    Flying-Cloud 224.JPG
    50,3 KB · Aufrufe: 81
  • Flying-Cloud 225.JPG
    Flying-Cloud 225.JPG
    49,1 KB · Aufrufe: 114
  • Flying-Cloud 226.JPG
    Flying-Cloud 226.JPG
    48,8 KB · Aufrufe: 76
  • Flying-Cloud 227.JPG
    Flying-Cloud 227.JPG
    36,3 KB · Aufrufe: 81
  • Flying-Cloud 229.JPG
    Flying-Cloud 229.JPG
    35,8 KB · Aufrufe: 78
Habe leider einige Abschnitte übersprungen, vor dem Bespannen wurde die Fläche noch fertig gestellt!!
Dieser Bauabschnitt folgt nun hier zwischen der Bespannung.
Jetzt werden die Servos in die Flächen eingebaut:
MFG Dieter
 

Anhänge

  • Flying-Cloud 178.JPG
    Flying-Cloud 178.JPG
    52,1 KB · Aufrufe: 80
  • Flying-Cloud 179.JPG
    Flying-Cloud 179.JPG
    52,2 KB · Aufrufe: 81
  • Flying-Cloud 180.JPG
    Flying-Cloud 180.JPG
    63,4 KB · Aufrufe: 82
  • Flying-Cloud 181.JPG
    Flying-Cloud 181.JPG
    64,4 KB · Aufrufe: 73
Die Servokabel habe ich in Ballermann - Trinkhalmen in der Tragfläche verlegt.
 

Anhänge

  • Flying-Cloud 182.JPG
    Flying-Cloud 182.JPG
    66,2 KB · Aufrufe: 75
  • Flying-Cloud 183.JPG
    Flying-Cloud 183.JPG
    62,6 KB · Aufrufe: 70
  • Flying-Cloud 186.JPG
    Flying-Cloud 186.JPG
    59,1 KB · Aufrufe: 73
  • Flying-Cloud 187.JPG
    Flying-Cloud 187.JPG
    53,8 KB · Aufrufe: 77
Die Steckverbindungen zum Empfänger werden mit eigeklebten MPX-Steckern in den Wurzelrippen erstellt.
 

Anhänge

  • Flying-Cloud 184.JPG
    Flying-Cloud 184.JPG
    69 KB · Aufrufe: 81
  • Flying-Cloud 185.JPG
    Flying-Cloud 185.JPG
    50,2 KB · Aufrufe: 79
  • Flying-Cloud 188.JPG
    Flying-Cloud 188.JPG
    50,6 KB · Aufrufe: 79
  • Flying-Cloud 189.JPG
    Flying-Cloud 189.JPG
    53,1 KB · Aufrufe: 77
  • Flying-Cloud 190.JPG
    Flying-Cloud 190.JPG
    49 KB · Aufrufe: 85
Nun wird der Rumpf fertig verschliffen:
 

Anhänge

  • Flying-Cloud 191.JPG
    Flying-Cloud 191.JPG
    35,4 KB · Aufrufe: 62
  • Flying-Cloud 192.JPG
    Flying-Cloud 192.JPG
    34,9 KB · Aufrufe: 72
  • Flying-Cloud 193.JPG
    Flying-Cloud 193.JPG
    36,1 KB · Aufrufe: 72
Das Modell in seiner ganzen Pracht, rohbaufertig auf der Werkbank.

Mit den Bespannen geht es weiter bei Nr. #32
 

Anhänge

  • Flying-Cloud 195.JPG
    Flying-Cloud 195.JPG
    73,4 KB · Aufrufe: 134
  • Flying-Cloud 196.JPG
    Flying-Cloud 196.JPG
    54,1 KB · Aufrufe: 128
  • Flying-Cloud 198.JPG
    Flying-Cloud 198.JPG
    57,9 KB · Aufrufe: 127
  • Flying-Cloud 201.JPG
    Flying-Cloud 201.JPG
    60 KB · Aufrufe: 129
  • Flying-Cloud 203.JPG
    Flying-Cloud 203.JPG
    70,3 KB · Aufrufe: 122
  • Flying-Cloud 204.JPG
    Flying-Cloud 204.JPG
    54,7 KB · Aufrufe: 125
  • Flying-Cloud 209.JPG
    Flying-Cloud 209.JPG
    77,3 KB · Aufrufe: 131
  • Flying-Cloud 210.JPG
    Flying-Cloud 210.JPG
    77,6 KB · Aufrufe: 128

Elofly

User
Hallo lieber Autor,

vielen Dank für den ausführlichen und mit viel Aufwand erstellten Baubericht, der mehr ist als nur eine Ergänzung zu der Bebilderung auf der dem Baukasten beiliegenden CD.
Den Baukasten habe ich bei Airfly geordert und wurde sehr schnell geliefert. Rumpf und Seitenleitwerk sind zwischenzeitlich fertig gestellt, so dass eine erste Zwischeneinschätzung wie folgt möglich ist.
Leider fehlen dem Baukasten nicht nur die auf der Homepage erwähnten Holzteile, sondern auch z.B. die benötigten Einschlagmuttern und die passenden Schrauben dazu. Nicht jeder Modellbauer hat solche Teile zu Hause rumliegen. Was für die Balsabretter noch hinnehmbar ist, gilt für den benötigten 5mm Buchenstab schon nicht mehr. Ist es zu viel verlangt ein paar Zentimeter solch einer Leiste dazu zu legen? Auch passende Ruderscharniere und Anlenkungsteile wären schön gewesen. Im Zweifelsfall kostet der Bausatz halt 10,-€ mehr.

Zur Konstruktion 2 Anmerkungen: Was hat den Konstrukteur gehindert den Rumpf 3mm breiter zu machen bei einem Modell mit 2,5m Spannweite. Die lichte Weite im Rumpf beträgt 37mm. Für einen Außenläufer mit 35mm Durchmesser ist das dann einfach ein Gemurkse. Außerdem sind die Stege, die beim lasern der Bauteile stehen bleiben teilweise an den unmöglichsten (filigransten) Stellen angeordnet. Da hat man wohl dem CAD-Programm zu viel überlassen.

Insgesamt gesehen ein schöner Bausatz mit Luft nach oben im Detail.

Liebe Grüße
Volker
 
Ansicht hell / dunkel umschalten
Oben Unten