Alexandre Cruz
User
I always wanted a laser machine to cut me designs but was reluctant as it might be too much trouble. So I searched the web and after talking to a member of this forum deciced to buy it. I put this post together because I fell there are somethings not so clear in the process. I purchase a 80W 700mx500mm from ebay from a german dealer, I am not sure about manufacturing origin so title maybe missleading.
0- Warranty: I have no idea and frankly would not expect support unless of shipping damage.
1. Size: The machine comes in a BIG box, aprox 1.1mx1mx1m made of wood. After disassembly the machine is aprox 1.1m long (due to tube extension) by 880mm wide (check your doors!) By 870mm high.
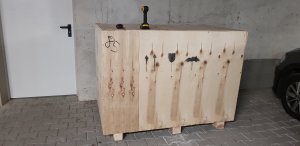
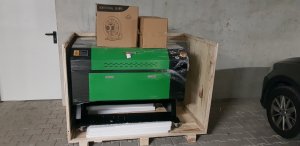
2. Inspection: The machine came dirty! No big deal but make sure to inspect the glass laser tude for cracks. A lot of the installation as water pipes and air assist is done in a poor way. Take note first than redo. It only takes some minutes each and saves a lot of headache in the future.
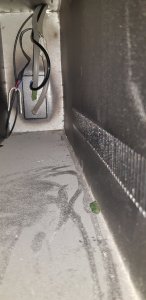
3. Disassembly: I have one 800 mm door so I had to disassemble the machine from the support. It is not complicated BUT the small M3 screws also fix the machine to the structure, It took me more than 2 hours to figure out. Hence, find them in the electronic compartment and the machine floor. Disassemble any part over the support structure, in my case the bed height adjustment mechanism.
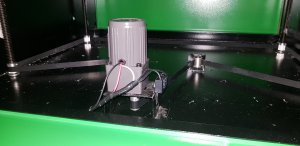
4. Cooling: C02 laser needs cooling and you will find lots of engine ways to cool it. I did not wanted to mess around and purchased a CW5000 (active chiller and pump), avoid CW3000 (which is only a heat exchanger), it was not super cheap but was a gerat choice
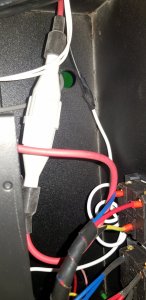
5. SAFETY: Make sure to check and redo many of the factory connections. Many of them were twisted wires and tape only! It is easy and very important to redo all these connections. Check grounding cables, they may save your life. Measure grounding to be low resistance.
MAKE SURE to take the time and only use the machine if you feel comfortable with the installation, there are certainly safer and better units on the market in this aspect. Purchase a fire extinguisher bottle and NEVER leave the machine unattended.
6. Exaustion: The machine came with an exaustor fan and the blue hoses, you need a window or ideally a filter system. If only the window is available make sure it is well sealed and there is an air intake somewhere else in the room. I used 10mm plywood and pipe insulation foam to seal around the window, works fine but I only cut wood.
7. Installation: The chiller drains more power than the machine itself so standard 230V 20A is normally sufficient, check grounding! I installed the air assist pump, the chiller and the exaust system in a 400x900mm metal shelf sideways with the machine
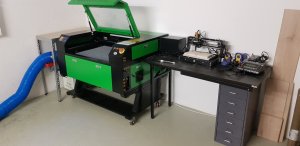
8. Software: Its code is produced by RDWorks and you can connect your PC or USB stick to it directly. RDWorks reads dxf files and allows basic editing.
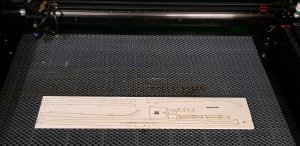
Purchasing and having the machine working can take as short as one week. After that, you should have a fantastic machine for hobby use, only limited by your capacity to create.
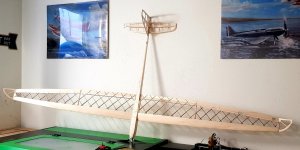
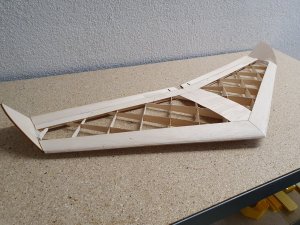
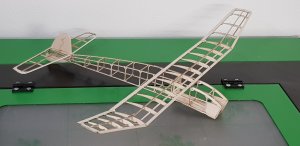
Have fun!
Alex
0- Warranty: I have no idea and frankly would not expect support unless of shipping damage.
1. Size: The machine comes in a BIG box, aprox 1.1mx1mx1m made of wood. After disassembly the machine is aprox 1.1m long (due to tube extension) by 880mm wide (check your doors!) By 870mm high.


2. Inspection: The machine came dirty! No big deal but make sure to inspect the glass laser tude for cracks. A lot of the installation as water pipes and air assist is done in a poor way. Take note first than redo. It only takes some minutes each and saves a lot of headache in the future.

3. Disassembly: I have one 800 mm door so I had to disassemble the machine from the support. It is not complicated BUT the small M3 screws also fix the machine to the structure, It took me more than 2 hours to figure out. Hence, find them in the electronic compartment and the machine floor. Disassemble any part over the support structure, in my case the bed height adjustment mechanism.

4. Cooling: C02 laser needs cooling and you will find lots of engine ways to cool it. I did not wanted to mess around and purchased a CW5000 (active chiller and pump), avoid CW3000 (which is only a heat exchanger), it was not super cheap but was a gerat choice
5. SAFETY: Make sure to check and redo many of the factory connections. Many of them were twisted wires and tape only! It is easy and very important to redo all these connections. Check grounding cables, they may save your life. Measure grounding to be low resistance.
MAKE SURE to take the time and only use the machine if you feel comfortable with the installation, there are certainly safer and better units on the market in this aspect. Purchase a fire extinguisher bottle and NEVER leave the machine unattended.

6. Exaustion: The machine came with an exaustor fan and the blue hoses, you need a window or ideally a filter system. If only the window is available make sure it is well sealed and there is an air intake somewhere else in the room. I used 10mm plywood and pipe insulation foam to seal around the window, works fine but I only cut wood.
7. Installation: The chiller drains more power than the machine itself so standard 230V 20A is normally sufficient, check grounding! I installed the air assist pump, the chiller and the exaust system in a 400x900mm metal shelf sideways with the machine

8. Software: Its code is produced by RDWorks and you can connect your PC or USB stick to it directly. RDWorks reads dxf files and allows basic editing.

Purchasing and having the machine working can take as short as one week. After that, you should have a fantastic machine for hobby use, only limited by your capacity to create.


Have fun!
Alex
Zuletzt bearbeitet:
