My Stingray 3.5
Part 2: the fuselage and the infusion process
Fuselage as any other part of my Stingray (except the canopy base and servo covers) is laminated by resin infusion, i.e. the each layer of fibre is applied on the mould without resin, all the layers are stitched together and to the mould with a light spray glue which does not interfere with the resin, on top of the last carbon layer a sheet of peelply is applied and then a “flow media” and a flow network (composed by hoses, spirals, resin barriers, connectors) is applied on the mould, then everything is closed with a vacuum bag. All around the perimeter of the mould the vacuum is applied and the resin is injected by atmospheric pressure in the fibre. This process results in a laminate almost without air trapped inside (air is removed before the resin infusion), the amount of resin is the minimum necessary to fill all the gaps between any single fibre, all the gaps between the fibres are filled. The repeatability of the process allows a difference in weight of 0.2% between two identical parts. Typical impregnation ratio is 40 grams of resin per 100 grams of fibre. The resulting surface has no pinhole at all if multiaxial fibre is used, very few pinholes if a fabric is used. On the other side infusion does not allow to paint with 2K enamel “in the mould” even if a gelcoat can be used.
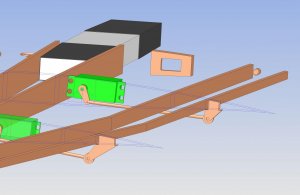
Fuselage is moulded with multiaxial, fabric and unidirectional carbon fibre, the bow is laminated with fibreglass (kewlar optional), in the bow there is a pretty strong plywood frame (c.n.c. cut, ready to be glued), in the middle of the fuse there is a plywood bracket for the rudder servo (also c.n.c. cut, ready to be assembled), rudder servo is in the middle of the fuse just after the wing trailing edge to get room for the water ballast, in the extreme stern just below the elevator there is a bay where to install the elevator servo with a plywood frame (also c.n.c. cut, ready to be assembled), the door for this bay and the canopy base are moulded by hand layup (no vacuum) on c.n.c. moulds. Canopy is thermoformed on a high quality plastic by a 3rd party company on an aluminium mould (I milled the mould) and c.n.c. cut in my shop. The fuselage is completely machined by my 5X milling centre, i.e. the canopy hole, canopy retaining holes, wing joiner holes, wing electrical connectors holes (d-sub 9 pins), elevator ball bearings pockets, elevator control arm slots, rudder axis holes are c.n.c. machined, no hand held tool is used except for light touch-up when necessary. A difference between my fuse and the most common ones is the way I glue the two halves together: infusion process permits to create inner flanges on the symmetry plane where a thin line of structural adhesive (I never use resin with microfiber or whatsoever filler to glue the parts) is applied to hold the two halve together… simple and effective.
Here is a video of a fuselage resin infusion, this is an old version when the centreboard was moulded separately:
https://www.facebook.com/Wikipiero/videos/234122840671327/
Here is a video of the canopy mould milling:
https://www.facebook.com/Wikipiero/videos/435098863782400/
Here is a video of the fuselage machining, again an old version, new foses are slightly different:
https://www.facebook.com/Wikipiero/videos/283084029108541/
")