Du verwendest einen veralteten Browser. Es ist möglich, dass diese oder andere Websites nicht korrekt angezeigt werden.
Du solltest ein Upgrade durchführen oder einen alternativen Browser verwenden.
Du solltest ein Upgrade durchführen oder einen alternativen Browser verwenden.
Beuteltank selbst herstellen
- Ersteller BenNolix
- Erstellt am

Schabi CH
User
södele
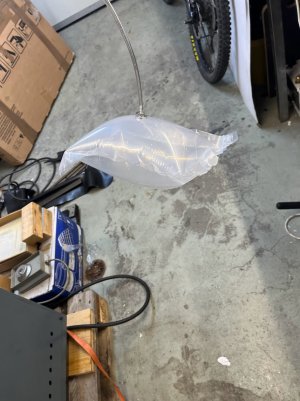
Heute hab ich die ersten Tests mit dem Stutzen gemacht.. ist keine neue Erfindung daher...
Alles doppellagig.. schnell schnell verschweisst.. Kompressor dran und gib saures.. nachdem er sich etwa ums 3fache ausgedehnt hat, machte es bumm :-)
Stutzen sind absolut dicht..
PS: sorry @Tobi. Ja die Filzpendel
Anhänge
Michael H.
User
Ich bastele gerade an einem kleinen (ca. 1l) Beutel für meine Grumania F-100, weil mich das ständige Gesiffe aus der Entlüftung des normalen Tanks nervt (nur am Flugplatz - im Keller ist natürlich ein Stopfen drin).
Ich hab den Beutel noch nicht eingebaut, aber die Anschlüsse aus bisherigen dem ZY-Hobby Tank habe ich weiterverwendet und bin mal gespannt, ob die mit den Gummidichtungen auch im Beutel gut funktionieren. Beim ersten Aufblasen ist alles dicht.
Das Hauptproblem in dem kleinen Flieger wird sein, beim ersten Betanken alle Luftblasen aus dem Beutel rauszubekommen. Das Ding kann sich in dem engen Rumpf nicht so entfalten, wie es gerne möchte.


LG Michael
Ich hab den Beutel noch nicht eingebaut, aber die Anschlüsse aus bisherigen dem ZY-Hobby Tank habe ich weiterverwendet und bin mal gespannt, ob die mit den Gummidichtungen auch im Beutel gut funktionieren. Beim ersten Aufblasen ist alles dicht.
Das Hauptproblem in dem kleinen Flieger wird sein, beim ersten Betanken alle Luftblasen aus dem Beutel rauszubekommen. Das Ding kann sich in dem engen Rumpf nicht so entfalten, wie es gerne möchte.
LG Michael
Festo blue
User
Hallo Michael,
musst halt die Vakuumpumpe vorher ansetzen, dann Tank füllen....
Man sieht sich beim Dreikönigsfliegen...
Grüße
Eberhard
musst halt die Vakuumpumpe vorher ansetzen, dann Tank füllen....
Man sieht sich beim Dreikönigsfliegen...
Grüße
Eberhard
TobiC170
User
Hi Michael,
Verwendet habe ich die gleichen Nippel, allerdings ohne die Gummis. Diese habe ich gegen eine harte Kunststoffscheibe/Ring ersetzt, damit beidseitig der Anpressdruck auf das Folienmaterial wirken kann.
Tests mit den Gummis waren weniger erfolgreich beim "Stressen" des Beutels und wurden undicht.
Die ersten Flüge damit waren super. Mal sehen was sie Saison bringt.
Michael H.
User
Hi Tobi,
dass die Gummis nicht soviel Kraft beim "stressen" des Beutels halten, damit kannst Du recht haben. die Idee ist mir garnicht gekommen.
Ich dachte eher, dass die den Druck gleichmäßiger auf die Folie bringen als harte Scheiben.
Ich probiere es jetzt aber einfach mal aus - sonst muss ich den Beutel ja wieder zersäbeln.
Ich tanke sowieso nie prallvoll. Und wenn er nicht dicht ist, kann ich immer noch einen neuen machen. Schauen wir mal...
LG Michael
Schabi CH
User
Hallo ihr Tankbastler :-)
Wieder viele Stunden und Versuche später...

sollte es langsam brauchbar sein

Aber den von Aliexpress bestellten Filtern traue ich nicht so ganz.. sind eine härtere Schaumlösung.. durch pumpen geht okay.. nur naja.. relativ hart..
Was für Filter verwendet ihr?
Versuche ja günstige Komplett-Tanks herzustellen.. daher möchte ich keine 15 Euro Filter verbauen.
Gruss Roman
Wieder viele Stunden und Versuche später...
sollte es langsam brauchbar sein
Aber den von Aliexpress bestellten Filtern traue ich nicht so ganz.. sind eine härtere Schaumlösung.. durch pumpen geht okay.. nur naja.. relativ hart..
Was für Filter verwendet ihr?
Versuche ja günstige Komplett-Tanks herzustellen.. daher möchte ich keine 15 Euro Filter verbauen.
Gruss Roman

Looks really good! I'm curious about your 3D printed fitting and the way you produced the cylinder. Would you mind explaining it en detail?
Thanks. The 3D design is not fully complete but it is getting better every time.
The cylinder design is not hard but i have issues with one corner that will leak. Once i know how how to weld them properly i will show how.
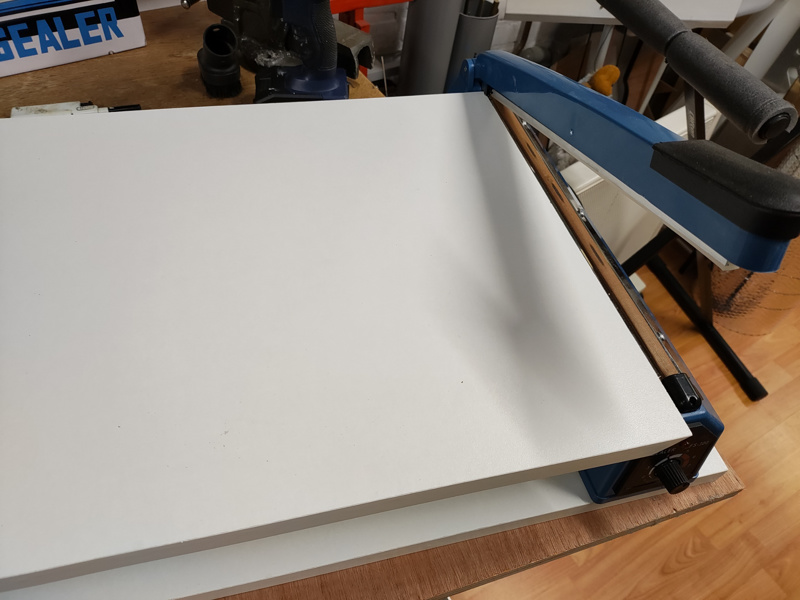
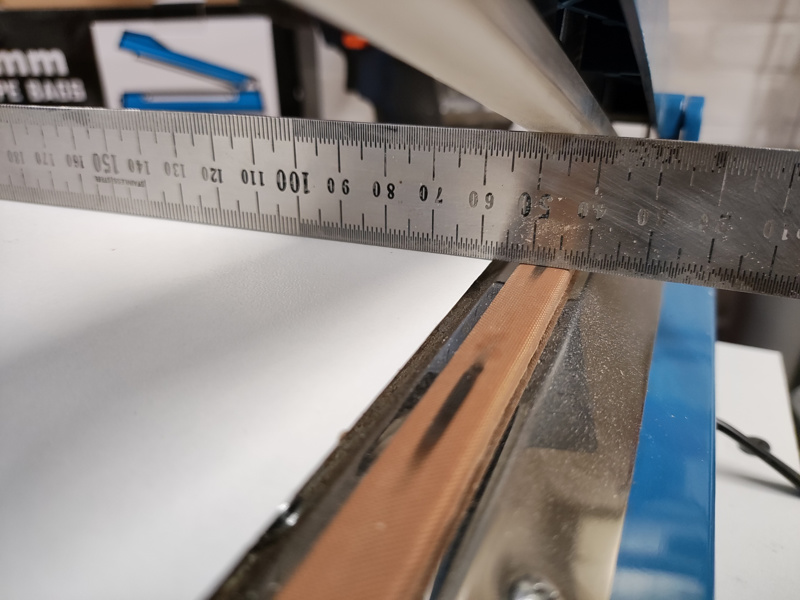
To use the seam welder better i made a small table for it. Works soooo much better. It needs some guide lines painted on.
Schabi CH
User
hoii.Tiptopkannst du ggf die Schnittmuster der einzelnen Folien und die Reihenfolge wie du diese dann zusammengeschweißt hast hier einstellen - spart Anderen (oder auch nur mir Doofie) Kopfzerbrechen und Fehlversuche

Ich mach mal ein paar Fotos vom Ablauf.
Dachte anfangs auch sei schwerer.
Mittlerweile sind die Nippel bei V3 und ausgereift.

ein nachträgliches Lösen von aussen ist durch den mittigen Sechskant problemlos möglich.. nix neues aber praktisch.
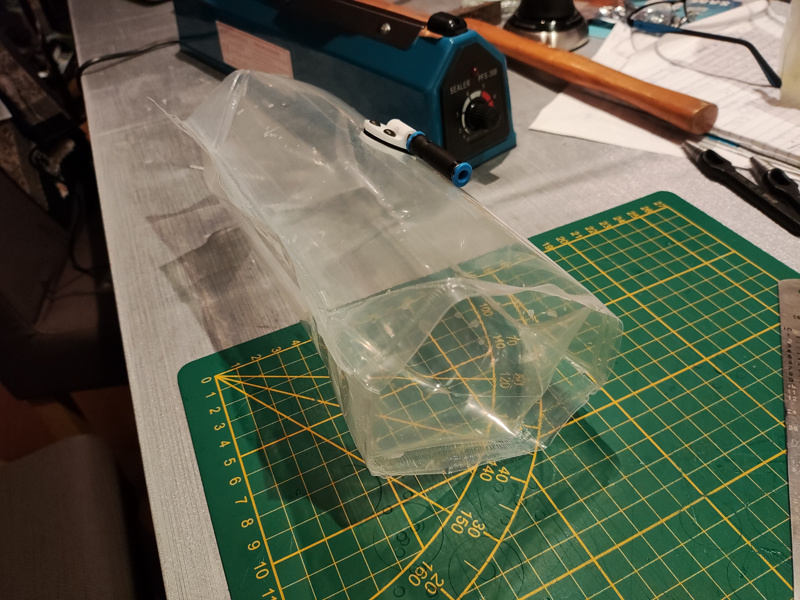
After trying a whole day to get cylinder bags to seal reliable i am about to give up. You need very good material (probably 200-250my PE/PA/PE) and a strong sealer.... but then i had an idea. A simple bag seals perfectly every time but the shape is about 20% less efficient (the reason why i am trying) but maybe i can change the shape after creating a simple bag? This is kinda easy..... ") The edges will fill up with fuel because there is the same difficult weld but nothing will leak out of the bag because of the reliable edge seal. If i seal the tips as much as possible this will not be an issue.
The edges will fill up with fuel because there is the same difficult weld but nothing will leak out of the bag because of the reliable edge seal. If i seal the tips as much as possible this will not be an issue.
Also trying out a simple through connector made from nylon M8 bolts from the hardware store drilled with a 4mm holde. This seals very well......
The edges will fill up with fuel because there is the same difficult weld but nothing will leak out of the bag because of the reliable edge seal. If i seal the tips as much as possible this will not be an issue.Also trying out a simple through connector made from nylon M8 bolts from the hardware store drilled with a 4mm holde. This seals very well......
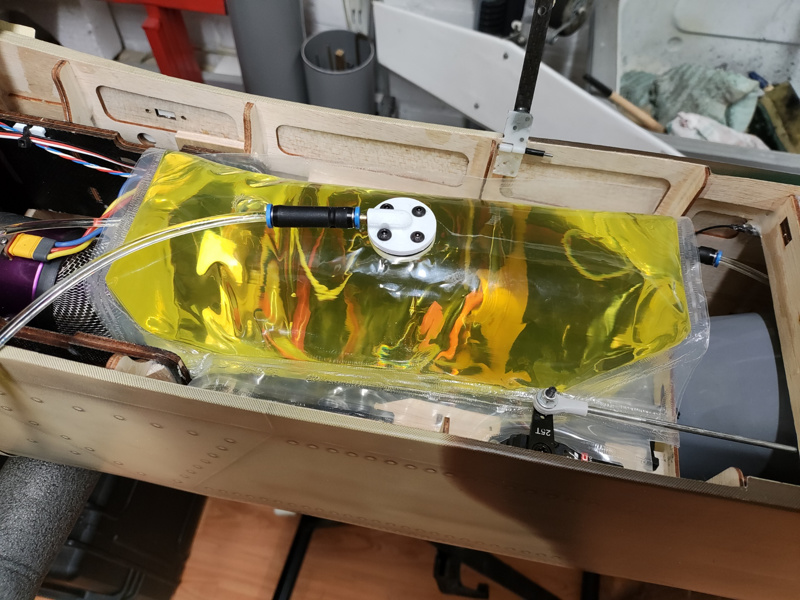
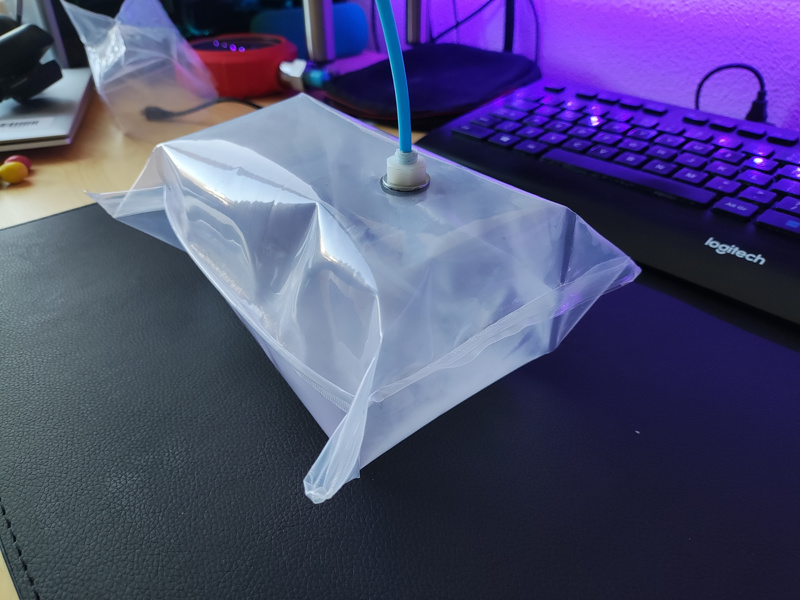
The photo above looks nice but welkding the corners made them hard en unreliable. After a few fill sessions they started leaking. The corners are also to stiff and the bag does not flatten well. But what if we simply fold the corners and tape them in place? This simply uses a flat bag with 4 straight seams. The shape is perfect and they flatten very nicely when empty. This does not look nice but if it works i am not complaining. It is also very easy to make a second layer by just making a slightly larger bag around the first.
The top connector works great now. I made an aluminium washer to use in the tank because the printed version was not reliable (M3 in printed material is not usable). This is a 3mm washer with 5 holes (4 screws and 1 hole for the fuel) and rounded edges. I will post details later in the 3D printed fitting thread. The straight through fitting is working great and the festo tubing is sealing very well inside the nylon bolt. I 3D printed a special washer with a small ring for a perfect small pressure point sealing the bag material against the rubber washer inside. I have ordered cintered clunks so i can make a tank that i can hopefully use in my plane.
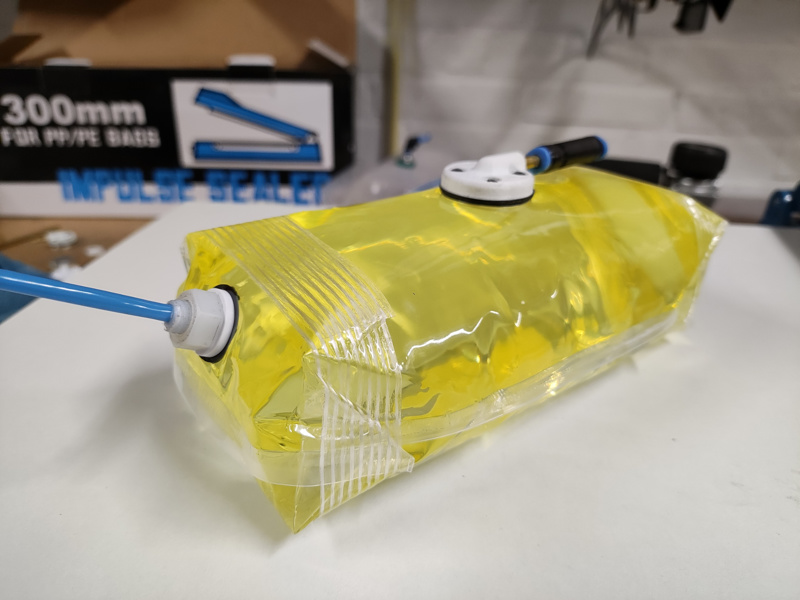
The top connector works great now. I made an aluminium washer to use in the tank because the printed version was not reliable (M3 in printed material is not usable). This is a 3mm washer with 5 holes (4 screws and 1 hole for the fuel) and rounded edges. I will post details later in the 3D printed fitting thread. The straight through fitting is working great and the festo tubing is sealing very well inside the nylon bolt. I 3D printed a special washer with a small ring for a perfect small pressure point sealing the bag material against the rubber washer inside. I have ordered cintered clunks so i can make a tank that i can hopefully use in my plane.
After testing the rubber that i used for the gaskets dissolves in the fuel. There is fuel resistent rubber for sale but it is difficult to find and / or expensive because of the bulk size it is sold in. On one website with comparisons i read about TPU, it should be good fuel resistent.... so i looked up the datasheet for the TPU that i have and it shows perfect resistance for kerosine So i now print the gaskets.....
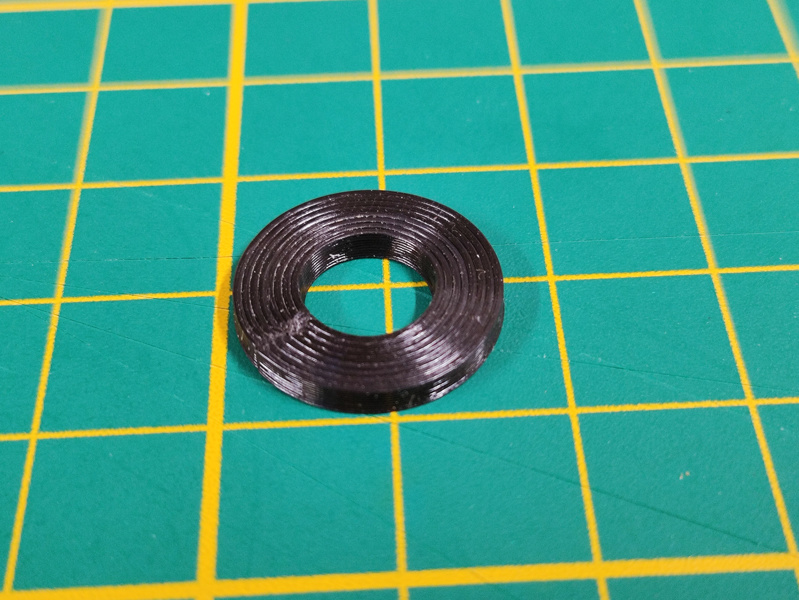
So i now print the gaskets.....
Schabi CH
User
Hi
Ich finde die Innovationen von Tadango cool.
Du gehst jedoch einen anderen Weg als ich.
Mein Ziel ist es möglichst wenig Teile.. Beispielsweise Schnellkupplungen (du hast gleich 2 hintereinander verbaut) sind bei einer Saugleitung ganz schlecht. Nach der Pumpe okay.. davor.. nope.
Dichtungen etc.. ist alles Zeugs das mit der Zeit spröd werden kann.. Kunststoff der Weichmacher verschwindet...
Ich habe mittlerweile nochmal aufgerüstet und eine Folienschweissanlage mit doppelter Leistung gekauft :-) jetzt fehlt nur noch eine richtig schön dicke Folie mit 200-300mü.
Gestern sind die neuen Tankfilter vom Chinesen gekommen.. top.. endlich mal brauchbar und preislich okay.
Gruss Roman
Yes, the festo in the suction part of the tubing is not a great idea.... for large engines. For my small engines it is no issue due to the low flowrates these engines require. For a 200N engine this will be different. The top printed connector is only for filling the tank. The connector with the blue festo tube is for the engine and can be replaced with a brass tube through the connector with a PU tubing around the brass.
Plastics will become weaker but a great for development. The TPU should have no issue for the long run. The printed top plate will be machined from alu later if the plastic fails but that will take many years. Most of my prints are still strong after many years of use. I don't see this as a real issue but i don't expect to these parts to last for 10 years also. I am very happy if the tanks hold up for a few years Then i probably have something better.
Plastics will become weaker but a great for development. The TPU should have no issue for the long run. The printed top plate will be machined from alu later if the plastic fails but that will take many years. Most of my prints are still strong after many years of use. I don't see this as a real issue but i don't expect to these parts to last for 10 years also. I am very happy if the tanks hold up for a few years
Then i probably have something better.Ähnliche Themen
- Antworten
- 14
- Aufrufe
- 2K