PRIME - RES "New Kid on the block!" Vorstellung ein Neues RES-segler

Ladies and Gentlemen, its PRIME- Time!

The Croatien company- CLM Pro- famous for their high tech quality on different gliders, both kits and spare parts with different fuses to match other brands has now entered the RES family.

Their first batch of the PRIME kits has now been delivered out to their world wide customers and I have today received the very first kit delivered to Sweden.

I will make a build/ flying thread for those interested, and it will be in English.

This will be my 3:d RES kit build for this season 2022, as some of you remember I have built both the VIKI and the MIRAI and covered in earlier threads here on this forum.

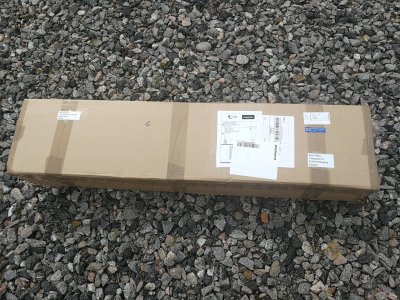
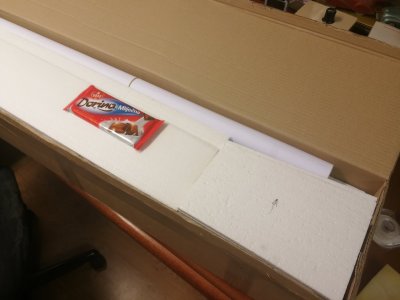
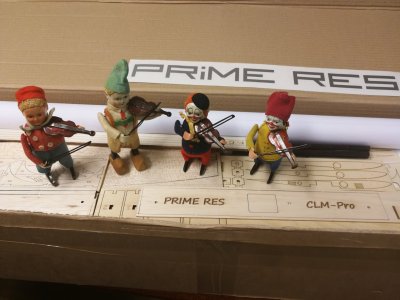
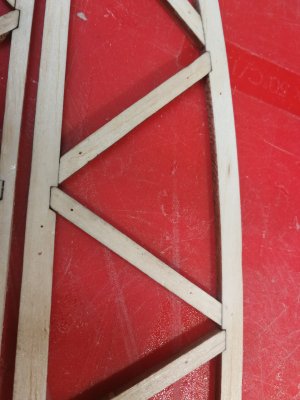
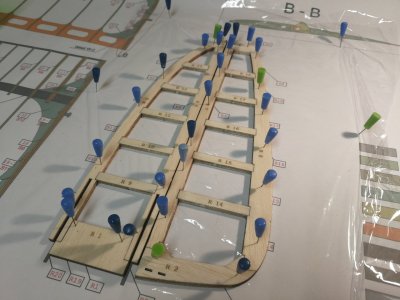
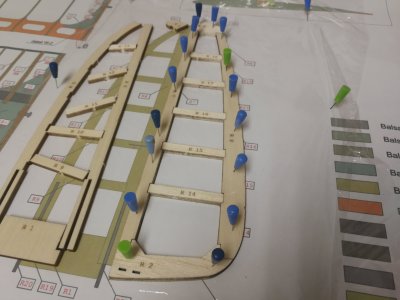
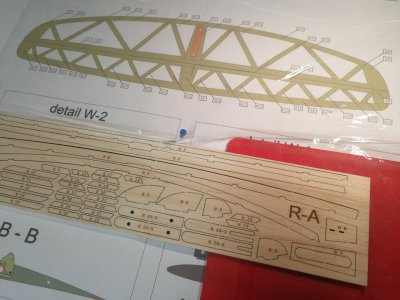
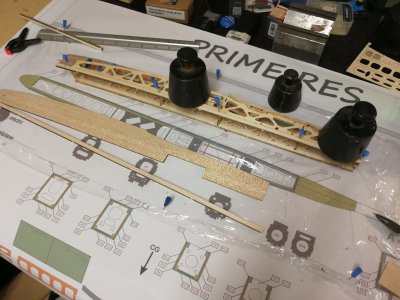
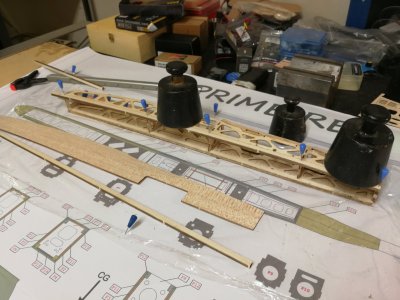
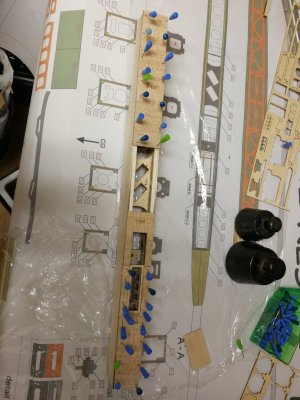
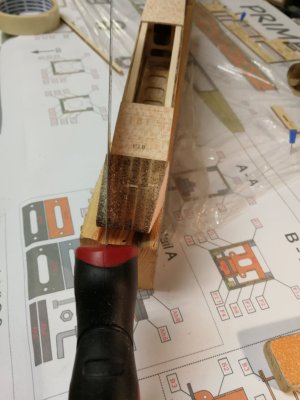
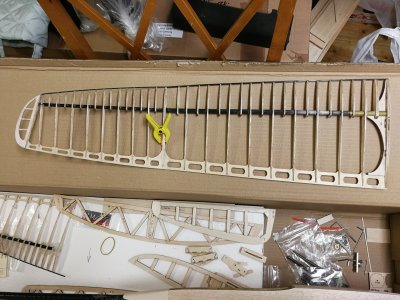
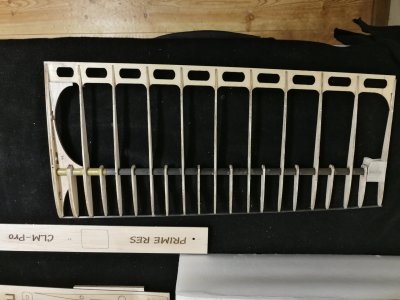
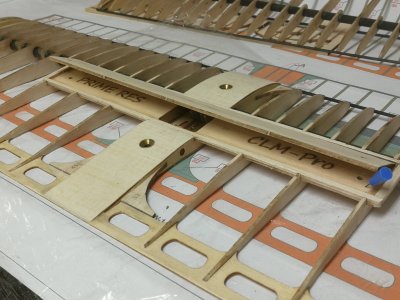
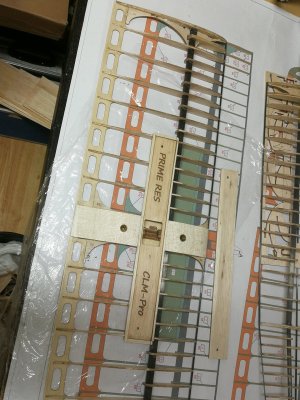
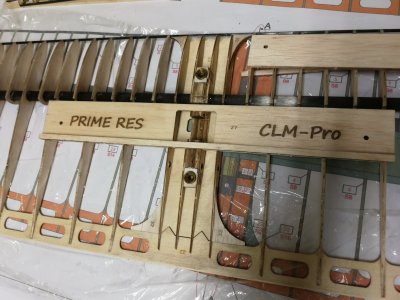
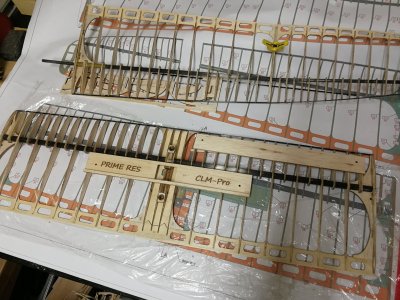
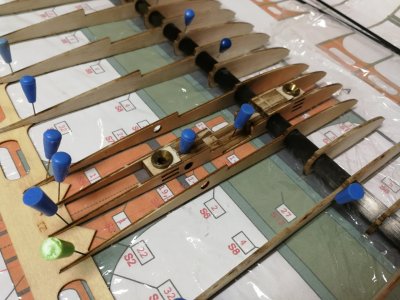
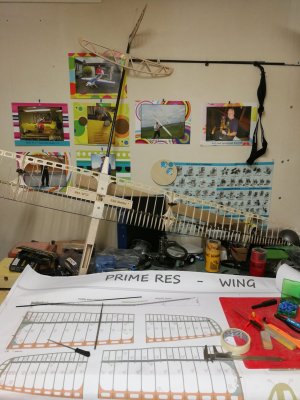
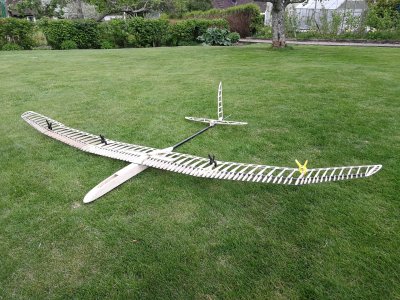
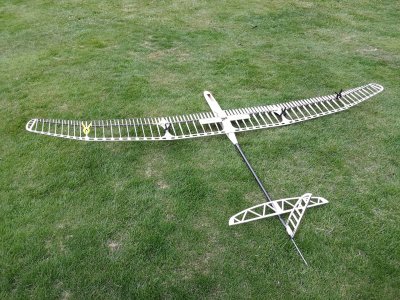
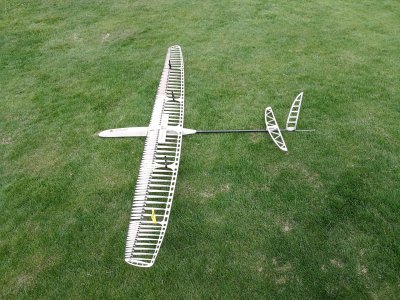
Unboxing to beginn with.....My first impressions are "WOW" very good packed, nice laser cut parts and the best drawing I have ever seen in any kit what so ever (and I can guarantee you that I have built many...planes in my years!) how about a drawing 2,5 meters long!! in multi colors to describe all parts and where they belong. Very good. The only missing thing in the very first batch is the building leaflets/instructions. But they are at the printers and will be included in coming kits.

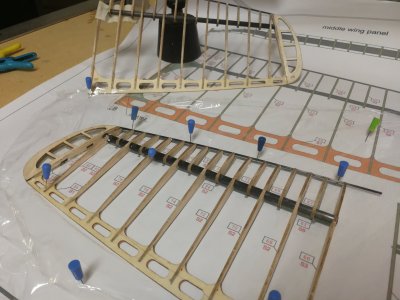
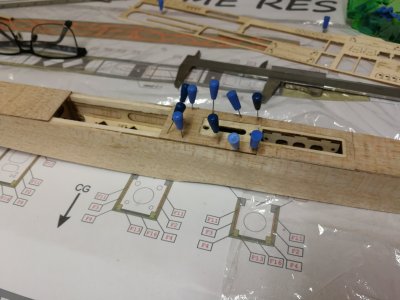
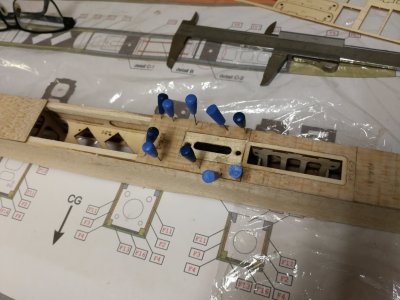
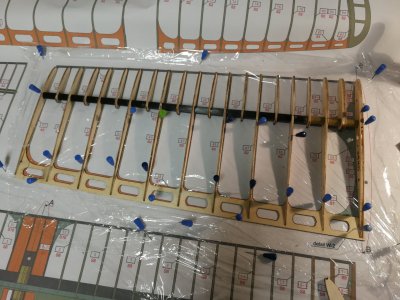
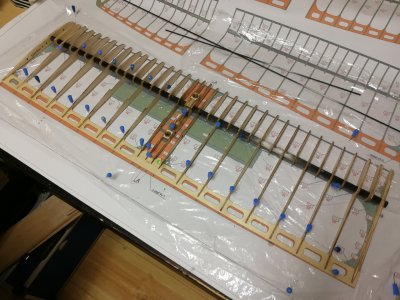
My next step is to go over the wood mtrls and make a necessary assortment to make the build easier.

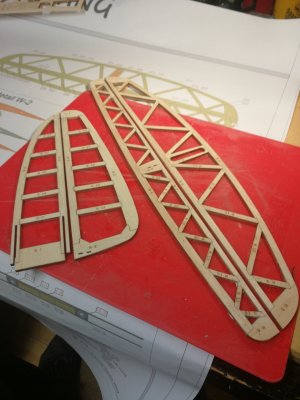
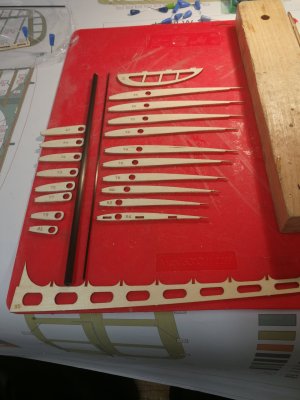
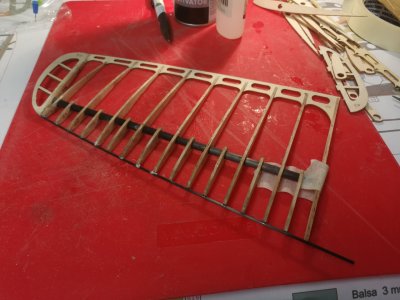
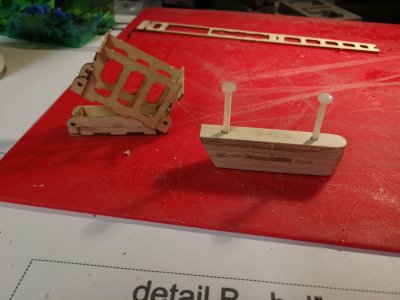
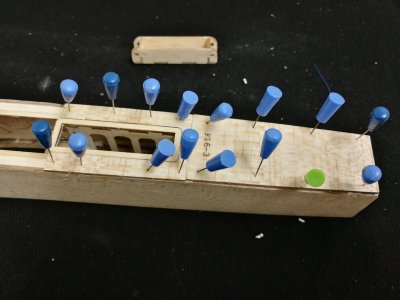
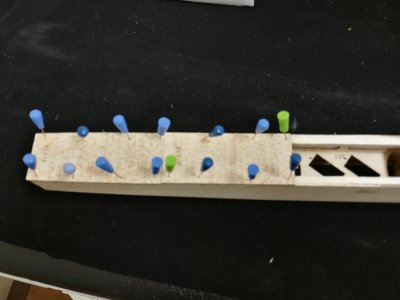
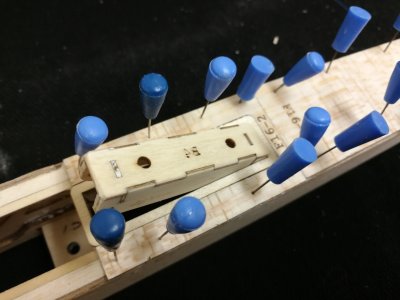
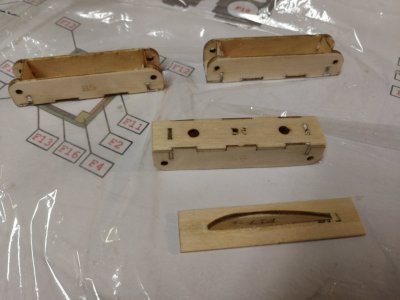
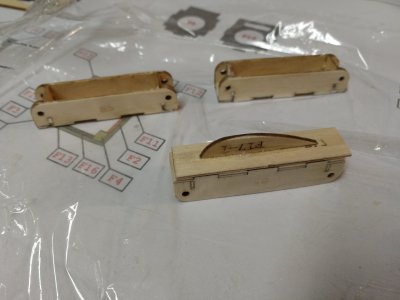
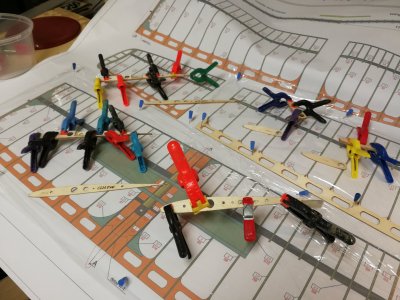
In my earlier builds I always start with the elevators and rudders just to get the feel of the kit and thats where I will start with the PRIME as well.

I will keep you uppdated on the "road" as soon as I make more progress with the build. So keep an eye on this thread, in the meantime "U take care"!
 
Heres some pics from the Unboxing.

CLM-Pro suprises their customers with a Croatien milk chocolat bar inside the lid, mmmm tastes good and will keep the build to a high level!
and of course my Mini- Schuco orchestra wanted to highlight the opening with a wonderful violin song!! What do you say about 2,5 meters of drawings.....can´t be better....
 

Anhänge

  • IMG_20220511_122100.jpg
    IMG_20220511_122100.jpg
    821 KB · Aufrufe: 404
  • IMG_20220511_122324.jpg
    IMG_20220511_122324.jpg
    226,4 KB · Aufrufe: 373
  • IMG_20220511_122542.jpg
    IMG_20220511_122542.jpg
    306,7 KB · Aufrufe: 405
  • IMG_20220511_122747.jpg
    IMG_20220511_122747.jpg
    351,9 KB · Aufrufe: 443

mipme_kampfkoloss

Vereinsmitglied
Teammitglied
Good luck for the built! The comparison to the Wiki and the Mirai gonna be interesting.
No D-Box, carbon rod spar, etc.
But most interesting will be your opinion on the central Spoiler vs. the split spoilers on the other two planes!
 
Had some time over tonight and puzzled together the elevator and rudder. Very good fit of the parts and very clean Laser cuts, hardly any blurr.. I use CA-glue on these parts to save some weight.

For those that want to read more info or place an order go to the producers webb site: https://www.clm-pro.com/
 

Anhänge

  • IMG_20220511_231344.jpg
    IMG_20220511_231344.jpg
    262,4 KB · Aufrufe: 231
  • IMG_20220511_231446.jpg
    IMG_20220511_231446.jpg
    369,2 KB · Aufrufe: 241
  • IMG_20220511_183915.jpg
    IMG_20220511_183915.jpg
    301,5 KB · Aufrufe: 241
  • IMG_20220511_182922.jpg
    IMG_20220511_182922.jpg
    223,9 KB · Aufrufe: 224
  • IMG_20220511_185511.jpg
    IMG_20220511_185511.jpg
    360 KB · Aufrufe: 232
Had some time over tonight and went for the outer wing tips, which are built up around a ply back former and carbon rod in the middle for the ribs and leading edge is a 3mm carbon rod. On the outer ribs you really have to lean on these as they are very fragile with very thin material around the opened holes for the carbon rod.
 

Anhänge

  • IMG_20220512_215919.jpg
    IMG_20220512_215919.jpg
    336,7 KB · Aufrufe: 251
  • IMG_20220512_231531.jpg
    IMG_20220512_231531.jpg
    312,1 KB · Aufrufe: 248
  • IMG_20220512_235510.jpg
    IMG_20220512_235510.jpg
    314,4 KB · Aufrufe: 250
FUSE-Time.....okey, started the build of the fuselage. The first picture shows the ballast chamber, for easy change of weights without
dissasembling the wing. The second part in picture 1 shows the saddle back for the elevator, it consists of 7parts balsa and ply plus 2pcs M3 Nut.

Pictures 2,3 and 4 shows the main part of the fuse. So far no surprises bearing in mind that I don´t the producers building instructions yet as they are on print. But I find the drawings so good that as an experienced builder this does not affect on the build......BUT...who knows maybe CLM-Pro had another way of thinking! time will show...
 

Anhänge

  • IMG_20220514_002624.jpg
    IMG_20220514_002624.jpg
    321,3 KB · Aufrufe: 266
  • IMG_20220514_002421.jpg
    IMG_20220514_002421.jpg
    373,6 KB · Aufrufe: 261
  • IMG_20220514_002410.jpg
    IMG_20220514_002410.jpg
    321,5 KB · Aufrufe: 265
  • IMG_20220514_002530.jpg
    IMG_20220514_002530.jpg
    324,9 KB · Aufrufe: 273
Build of the fuselage continues........time for the balsa covering of the ply fuse parts
 

Anhänge

  • IMG_20220516_212654.jpg
    IMG_20220516_212654.jpg
    266,2 KB · Aufrufe: 173
  • IMG_20220516_212649.jpg
    IMG_20220516_212649.jpg
    293,4 KB · Aufrufe: 175
  • IMG_20220516_192132.jpg
    IMG_20220516_192132.jpg
    353,9 KB · Aufrufe: 167
  • IMG_20220516_184604.jpg
    IMG_20220516_184604.jpg
    246,1 KB · Aufrufe: 172
  • IMG_20220516_182931.jpg
    IMG_20220516_182931.jpg
    161,9 KB · Aufrufe: 158
the pictures shows the smart way of loading/unloading the ballast camber in the fuse without dis-assembling of the main wing. In the kit there are 3 ballast boxes to glue together which means that you can have 3 ballast boxes with different weights and its easy to change at the field depending on wind conditions. Smart!
 

Anhänge

  • IMG_20220516_184634.jpg
    IMG_20220516_184634.jpg
    200 KB · Aufrufe: 195
  • IMG_20220516_182246.jpg
    IMG_20220516_182246.jpg
    245 KB · Aufrufe: 191
Fuselage complete with one hatchet, 1 out of 2. The one in the picture is for easy access , upp front of the fuse, for the Battery / Receiver etc.
 

Anhänge

  • IMG_20220516_221001.jpg
    IMG_20220516_221001.jpg
    361,4 KB · Aufrufe: 135
Zuletzt bearbeitet:
Now its time for the fuselage carbon rod, installed inside the fuse and where you mount the elevator saddle and rudder. When drilling or sawing in carbon fiber rods etc always be shure to tape the part where you for ex drill or cut of the length of the rod etc. I use normal paper tape used by painters etc, this is so that the fibers don´t split when worked on. In pic1 U can se that I have marked upp on 3 positions. Pic 2 shows the balsa blocks ( two halves) glued in place. this part will later on be sanded down to a slimmer shape. Pic3 shows how far in the fuse the Fuse Rod is glued in place and finally last pic shows the nose cone glued together of 7 balsa parts ,which the 3 in the middle are lightened and hollow inside. When dried the nose cone will then be shaped to follow the fuse contours.

BTW today I received a package from CLM-Pro with all necessary parts to build the electrical fuse. I will make a separate build thread on that part later on. I find it good to have one fuse of each, for towing and electrical use. The later for lazy days!
 

Anhänge

  • IMG_20220517_000406 (1).jpg
    IMG_20220517_000406 (1).jpg
    241,3 KB · Aufrufe: 192
  • IMG_20220516_234450 (1).jpg
    IMG_20220516_234450 (1).jpg
    288,2 KB · Aufrufe: 213
  • IMG_20220516_234435.jpg
    IMG_20220516_234435.jpg
    282,3 KB · Aufrufe: 202
  • IMG_20220516_231359 (1).jpg
    IMG_20220516_231359 (1).jpg
    335,2 KB · Aufrufe: 218
Zuletzt bearbeitet:
just wanted to show the fastening parts for the elevator since this is missing! on the drawings. Pic1 shows the parts needed and pic2 swows the complete part, No big deal but maybe some builders will scratch their hair one or two times before getting it right. So be my guest and that goes btw for all pictures and instructions on my Prime thread, free to choose.

So just get yr kit now and start building....place yr order to: https://www.clm-pro.com/
 

Anhänge

  • IMG_20220517_100432.jpg
    IMG_20220517_100432.jpg
    279,6 KB · Aufrufe: 139
  • IMG_20220517_100630.jpg
    IMG_20220517_100630.jpg
    235 KB · Aufrufe: 135
Nose cutting with a very useful tool, the Japanese saw....I bought mine at Lidl.

Next step is to sand and get the right shape
 

Anhänge

  • IMG_20220519_121240.jpg
    IMG_20220519_121240.jpg
    320,1 KB · Aufrufe: 144
  • IMG_20220519_115709.jpg
    IMG_20220519_115709.jpg
    243,8 KB · Aufrufe: 141
Ballast boxes, there are 3 in the kit to build together. The good thing is that this makes it possible to have different lead weights depending on the winds and its easy to install in the fuselage without the need of disassembling the wing or opening the fuse lid to put in different lead tubes. This method is very smart and fast to change. Good thinking there CLM-Pro!
 

Anhänge

  • IMG_20220519_134735.jpg
    IMG_20220519_134735.jpg
    230,5 KB · Aufrufe: 115
  • IMG_20220519_134747.jpg
    IMG_20220519_134747.jpg
    225,6 KB · Aufrufe: 105
Lots of gluing!!! several reinforced ribs combined with balsa/ply....pic1 & 2. Middle wing glued together in pics 3,4 &5
 

Anhänge

  • IMG_20220519_213445.jpg
    IMG_20220519_213445.jpg
    465,6 KB · Aufrufe: 177
  • IMG_20220519_201417.jpg
    IMG_20220519_201417.jpg
    305,5 KB · Aufrufe: 170
  • IMG_20220519_172931.jpg
    IMG_20220519_172931.jpg
    393,8 KB · Aufrufe: 161
  • IMG_20220519_143531.jpg
    IMG_20220519_143531.jpg
    249,6 KB · Aufrufe: 150
  • IMG_20220519_150033.jpg
    IMG_20220519_150033.jpg
    375,1 KB · Aufrufe: 168
Time for the assembly of the Mid (main) wing.

Pics 1, 2 and 3 shows the most important part of the main wings construction. This is the part that holds together the main wing and which will be mounted and screwed into the fuselage. No cheating here!!

The rest of the pics shows the final assembly and gluing of the ribs, spoiler (mid placed as one big spoiler) and final and last pic shows what its all about!
 

Anhänge

  • IMG_20220520_141040.jpg
    IMG_20220520_141040.jpg
    372,8 KB · Aufrufe: 202
  • IMG_20220520_141009.jpg
    IMG_20220520_141009.jpg
    474,3 KB · Aufrufe: 204
  • IMG_20220520_105130.jpg
    IMG_20220520_105130.jpg
    369,1 KB · Aufrufe: 203
  • IMG_20220520_105119.jpg
    IMG_20220520_105119.jpg
    491,5 KB · Aufrufe: 193
  • IMG_20220520_001730.jpg
    IMG_20220520_001730.jpg
    425,5 KB · Aufrufe: 203
  • IMG_20220520_001741.jpg
    IMG_20220520_001741.jpg
    364,4 KB · Aufrufe: 198
  • IMG_20220519_231004.jpg
    IMG_20220519_231004.jpg
    430,3 KB · Aufrufe: 199
  • IMG_20220519_230947.jpg
    IMG_20220519_230947.jpg
    429,8 KB · Aufrufe: 198
WOOD finished....now the wing and fuselage are wooden finished and sanded and shaped to a "Winning Concept"..!
 

Anhänge

  • IMG_20220520_180843.jpg
    IMG_20220520_180843.jpg
    399,4 KB · Aufrufe: 359
  • IMG_20220520_180339.jpg
    IMG_20220520_180339.jpg
    907,6 KB · Aufrufe: 385
  • IMG_20220520_175118.jpg
    IMG_20220520_175118.jpg
    1,1 MB · Aufrufe: 370
  • IMG_20220520_175100.jpg
    IMG_20220520_175100.jpg
    1,2 MB · Aufrufe: 291
It´s PRIME Time.....the fuselage and wings are wooden finished and now waiting for some "clothes and decoration"!

I will decide a couple of hours/days for my final design......Soon to come...so in the meantime and Enjoy...

Place yr order for yr own PRIME RES glider at CLM-PRO, link: https://www.clm-pro.com/

You are most welcome to use my build thread with pictures to help you out in your own build....by the time you place yr order CLM-PRO will most likely have their build instructions ready for delivery, although I built my "ship" without any instructions tas he drawings are so good (I´ve said it before and I will say it once again, the very best drawings I have ever received in a kit) Good work CLM-PRO.

So far I have appr. 12hrs effective building time in the finished wood status.

For U "nerd" guys I will come back with some weight data on every important part/piece if U want to compare against other brands.

My next step, besides giving my glider som covering, I will start to build the electro fuselage and I can use the same wing setup for both Thermal and Electro versions. Gives this glider the optimal acess for lazy or competition days...

In the meantime, U guys take care!
 

Anhänge

  • IMG_20220520_180245.jpg
    IMG_20220520_180245.jpg
    1 MB · Aufrufe: 232
  • IMG_20220520_180303.jpg
    IMG_20220520_180303.jpg
    1,1 MB · Aufrufe: 233
  • IMG_20220520_180255.jpg
    IMG_20220520_180255.jpg
    1.010,4 KB · Aufrufe: 224
Ansicht hell / dunkel umschalten
Oben Unten